# null
Source: https://docs.tryvinci.com/CLAUDE
```markdown
# Mintlify documentation
## Working relationship
- You can push back on ideas-this can lead to better documentation. Cite sources and explain your reasoning when you do so
- ALWAYS ask for clarification rather than making assumptions
- NEVER lie, guess, or make up information
## Project context
- Format: MDX files with YAML frontmatter
- Config: docs.json for navigation, theme, settings
- Components: Mintlify components
## Content strategy
- Document just enough for user success - not too much, not too little
- Prioritize accuracy and usability of information
- Make content evergreen when possible
- Search for existing information before adding new content. Avoid duplication unless it is done for a strategic reason
- Check existing patterns for consistency
- Start by making the smallest reasonable changes
## Frontmatter requirements for pages
- title: Clear, descriptive page title
- description: Concise summary for SEO/navigation
## Writing standards
- Second-person voice ("you")
- Prerequisites at start of procedural content
- Test all code examples before publishing
- Match style and formatting of existing pages
- Include both basic and advanced use cases
- Language tags on all code blocks
- Alt text on all images
- Relative paths for internal links
## Git workflow
- NEVER use --no-verify when committing
- Ask how to handle uncommitted changes before starting
- Create a new branch when no clear branch exists for changes
- Commit frequently throughout development
- NEVER skip or disable pre-commit hooks
## Do not
- Skip frontmatter on any MDX file
- Use absolute URLs for internal links
- Include untested code examples
- Make assumptions - always ask for clarification
```
# Introduction
Source: https://docs.tryvinci.com/api-reference/introduction
Example section for showcasing API endpoints
If you're not looking to build API reference documentation, you can delete
this section by removing the api-reference folder.
## Welcome
There are two ways to build API documentation: [OpenAPI](https://mintlify.com/docs/api-playground/openapi/setup) and [MDX components](https://mintlify.com/docs/api-playground/mdx/configuration). For the starter kit, we are using the following OpenAPI specification.
View the OpenAPI specification file
## Authentication
All API endpoints are authenticated using Bearer tokens and picked up from the specification file.
```json
"security": [
{
"bearerAuth": []
}
]
```
# Changelog
Source: https://docs.tryvinci.com/changelog
Product updates and announcements
## Multi-Image Generator
**New features**
* Added image role labeling (product, person, environment, style, text)
* Implemented drag-and-drop file upload interface
* Made image uploads optional for text-to-image workflows
* Added aspect ratio selection controls
**Improvements**
* Redesigned upload experience with visual feedback
* Enhanced mobile interface responsiveness
## Prompt Generator
**New features**
* Added multi-select preset combinations
* Implemented dynamic prompt suggestions
* Added real-time token counting
**Improvements**
* Redesigned prompt creation interface
## Pricing
**Improvements**
* Updated pricing page layout for annual vs monthly plans
* Filtered plan display to show relevant options only
* Changed subscription button text to "Subscribe Now"
## Platform
**New features**
* Added dedicated assets management page
* Implemented inline audio playback controls
* Added homepage video asset filtering as default
**Improvements**
* Reorganized content categories (Labs, Static, Publishing)
* Enhanced asset browsing and search functionality
## Voice and Audio
**New features**
* Upgraded text-to-speech API
* Added voice cloning capabilities
* Implemented original audio preservation option
**Improvements**
* Enhanced voice generation quality and accuracy
## Live Portrait
**New features**
* Added live portrait animation functionality
* Implemented asynchronous processing
**Improvements**
* Streamlined image-to-animation workflow
## User Experience
**New features**
* Added automatic 20 credit allocation for new users
* Implemented webhook-based registration flow
* Added avatar organization by type (character, object, environment)
**Bug fixes**
* Fixed avatar image upload URL generation
* Resolved credit system abuse vulnerabilities
## Platform Stability
**Bug fixes**
* Resolved audio processing pipeline issues
* Fixed asset generation delays and timeouts
* Improved error message clarity
## Asset Management
**New features**
* Added asset search functionality
* Implemented sorting by date, name, and type
* Added grid and list view options
**Improvements**
* Enhanced thumbnail generation for all content types
* Optimized asset loading performance
## Foundation Release
**New features**
* Released core image generation workflows
* Added video creation functionality
* Implemented user authentication system
* Added asset management capabilities
**Improvements**
* Optimized mobile interface performance
* Implemented asset caching system
# Image to Video
Source: https://docs.tryvinci.com/docs/api-reference/image-to-video
Animate a static image into a short video using motion described by a prompt.
Transform static images into dynamic videos with motion and effects.
```http title="Endpoint"
POST /api/v1/generate/image-to-video
```
```http title="Authentication"
Authorization: Bearer sk-your-api-key-here
```
## Request (multipart/form-data)
| Parameter | Type | Description | Default |
| ----------------- | ---- | -------------------------------- | -------- |
| image | file | Input image (JPEG/PNG) | Required |
| prompt | text | Motion or behavioral description | Required |
| duration\_seconds | text | Length in seconds (1–10) | 5 |
```json title="200 OK"
{
"request_id": "req_abc123...",
"status": "pending",
"estimated_cost_usd": 0.25,
"estimated_duration_seconds": 5
}
```
## Code examples
```curl cURL
curl -X POST "https://tryvinci.com/api/v1/generate/image-to-video" \
-H "Authorization: Bearer sk-your-api-key-here" \
-F "image=@portrait.jpg" \
-F "prompt=The person starts smiling and waves at the camera" \
-F "duration_seconds=6"
```
```python image_to_video.py
import requests
url = "https://tryvinci.com/api/v1/generate/image-to-video"
headers = {"Authorization": "Bearer sk-your-api-key-here"}
files = {"image": open("portrait.jpg", "rb")}
data = {
"prompt": "The person starts smiling and waves at the camera",
"duration_seconds": "6"
}
r = requests.post(url, headers=headers, files=files, data=data)
r.raise_for_status()
result = r.json()
print(f"Request ID: {result['request_id']}")
print(f"Estimated: ${result['estimated_cost_usd']}")
```
```javascript image_to_video.js
const input = document.getElementById("imageInput");
const file = input.files?.[0];
if (!file) throw new Error("Choose an image file first");
const form = new FormData();
form.append("image", file);
form.append("prompt", "The person starts smiling and waves at the camera");
form.append("duration_seconds", "6");
const r = await fetch("https://tryvinci.com/api/v1/generate/image-to-video", {
method: "POST",
headers: { "Authorization": "Bearer sk-your-api-key-here" },
body: form,
});
if (!r.ok) throw new Error(`HTTP ${r.status}`);
const result = await r.json();
console.log(`Request ID: ${result.request_id}`);
console.log(`Estimated: $${result.estimated_cost_usd}`);
```
## Next
After submitting the job, use [Status Checking](/docs/api-reference/status-checking) to poll progress and retrieve the final video.
# Status Checking
Source: https://docs.tryvinci.com/docs/api-reference/status-checking
Poll the status endpoint to track generation progress and retrieve results.
Generation is asynchronous. Use the status endpoint to check when your video is ready.
Related
* [Video generation](/docs/api-reference/video-generation)
```http title="Endpoint"
GET /api/v1/status/{request_id}
```
```http title="Authentication"
Authorization: Bearer sk-your-api-key-here
```
## Status responses
```json title="Pending"
{
"request_id": "req_abc123...",
"status": "pending",
"estimated_cost_usd": 0.25
}
```
```json title="Processing"
{
"request_id": "req_abc123...",
"status": "processing",
"estimated_cost_usd": 0.25,
"progress": 45
}
```
```json title="Completed"
{
"request_id": "req_abc123...",
"status": "completed",
"video_url": "https://storage.googleapis.com/vinci-dev/videos/generated_video.mp4",
"duration_seconds": 5.2,
"cost_usd": 0.26
}
```
```json title="Failed"
{
"request_id": "req_abc123...",
"status": "failed",
"error": "Invalid prompt format"
}
```
## Code examples
```curl cURL
curl -X GET "https://tryvinci.com/api/v1/status/your-request-id" \
-H "Authorization: Bearer sk-your-api-key-here"
```
```python poll_status.py
import requests, time
API_KEY = "sk-your-api-key-here"
request_id = "your-request-id"
url = f"https://tryvinci.com/api/v1/status/{request_id}"
headers = {"Authorization": f"Bearer {API_KEY}"}
while True:
r = requests.get(url, headers=headers)
r.raise_for_status()
s = r.json()
if s["status"] == "completed":
print(f"Video ready: {s['video_url']}")
break
if s["status"] == "failed":
print("Generation failed")
break
print(f"Status: {s['status']}")
time.sleep(5)
```
```javascript poll_status.js
const API_KEY = "sk-your-api-key-here";
const requestId = "your-request-id";
async function checkStatus() {
const r = await fetch(`https://tryvinci.com/api/v1/status/${requestId}`, {
headers: { "Authorization": `Bearer ${API_KEY}` },
});
if (!r.ok) throw new Error(`HTTP ${r.status}`);
const s = await r.json();
if (s.status === "completed") {
console.log(`Video ready: ${s.video_url}`);
return;
}
if (s.status === "failed") {
console.log("Generation failed");
return;
}
console.log(`Status: ${s.status}`);
setTimeout(checkStatus, 5000);
}
checkStatus();
```
# Video Generation
Source: https://docs.tryvinci.com/docs/api-reference/video-generation
Generate videos from text or images. Text-to-Video and Image-to-Video endpoints with examples.
Create high-quality videos from text descriptions or transform static images into dynamic video content.
Related
* [Check status](/docs/api-reference/status-checking)
## Pricing
Video generation costs \$0.05 per second of generated video.
Tip
Check your balance before generating videos to ensure you have sufficient credits.
## Text-to-Video
```http title="Endpoint"
POST /api/v1/generate/text-to-video
```
```http title="Authentication"
Authorization: Bearer sk-your-api-key-here
```
### Request body
| Parameter | Type | Description | Default |
| ----------------- | ------- | ----------------------------------------- | ----------- |
| prompt | string | Text description of the video to generate | Required |
| duration\_seconds | integer | Video duration in seconds (1–10) | 5 |
| aspect\_ratio | string | One of "16:9", "9:16", "1:1" | "16:9" |
| seed | integer | Random seed for reproducible results | -1 (random) |
### Response
```json title="200 OK"
{
"request_id": "req_abc123...",
"status": "pending",
"estimated_cost_usd": 0.25,
"estimated_duration_seconds": 5
}
```
### Code examples
```curl cURL
curl -X POST "https://tryvinci.com/api/v1/generate/text-to-video" \
-H "Authorization: Bearer sk-your-api-key-here" \
-H "Content-Type: application/json" \
-d '{
"prompt": "A majestic eagle soaring through mountain peaks at sunset",
"duration_seconds": 8,
"aspect_ratio": "16:9"
}'
```
```python text_to_video.py
import requests, time
url = "https://tryvinci.com/api/v1/generate/text-to-video"
headers = {
"Authorization": "Bearer sk-your-api-key-here",
"Content-Type": "application/json"
}
data = {
"prompt": "A majestic eagle soaring through mountain peaks at sunset",
"duration_seconds": 8,
"aspect_ratio": "16:9"
}
r = requests.post(url, headers=headers, json=data)
r.raise_for_status()
result = r.json()
request_id = result["request_id"]
print(f"Generation started. Request ID: {request_id} Estimated cost: ${result['estimated_cost_usd']}")
# Poll
status_url = f"https://tryvinci.com/api/v1/status/{request_id}"
while True:
s = requests.get(status_url, headers={"Authorization": "Bearer sk-your-api-key-here"})
s.raise_for_status()
status = s.json()
print(f"Status: {status['status']}")
if status["status"] == "completed":
print(f"Video: {status['video_url']}")
print(f"Duration: {status['duration_seconds']}s Cost: ${status['cost_usd']}")
break
if status["status"] == "failed":
print("Generation failed")
break
time.sleep(5)
```
```javascript text_to_video.js
async function generate() {
const create = await fetch("https://tryvinci.com/api/v1/generate/text-to-video", {
method: "POST",
headers: {
"Authorization": "Bearer sk-your-api-key-here",
"Content-Type": "application/json",
},
body: JSON.stringify({
prompt: "A majestic eagle soaring through mountain peaks at sunset",
duration_seconds: 8,
aspect_ratio: "16:9",
}),
});
if (!create.ok) throw new Error(`HTTP ${create.status}`);
const result = await create.json();
const requestId = result.request_id;
console.log(`Request: ${requestId} Estimated $${result.estimated_cost_usd}`);
// Poll
async function poll() {
const r = await fetch(`https://tryvinci.com/api/v1/status/${requestId}`, {
headers: { "Authorization": "Bearer sk-your-api-key-here" },
});
if (!r.ok) throw new Error(`HTTP ${r.status}`);
const s = await r.json();
console.log(`Status: ${s.status}`);
if (s.status === "completed") {
console.log(`Video: ${s.video_url}`);
console.log(`Duration: ${s.duration_seconds}s Cost: $${s.cost_usd}`);
return;
}
if (s.status === "failed") return console.log("Generation failed");
setTimeout(poll, 5000);
}
poll();
}
generate();
```
## Image-to-Video
```http title="Endpoint"
POST /api/v1/generate/image-to-video
```
```http title="Authentication"
Authorization: Bearer sk-your-api-key-here
```
### Request body (multipart form)
| Parameter | Type | Description | Default |
| ----------------- | ------- | -------------------------------- | -------- |
| image | file | Input image (JPEG/PNG) | Required |
| prompt | string | Text describing motion | Required |
| duration\_seconds | integer | Video duration in seconds (1–10) | 5 |
### Response
```json title="200 OK"
{
"request_id": "req_abc123...",
"status": "pending",
"estimated_cost_usd": 0.25,
"estimated_duration_seconds": 5
}
```
### Code examples
```curl cURL
curl -X POST "https://tryvinci.com/api/v1/generate/image-to-video" \
-H "Authorization: Bearer sk-your-api-key-here" \
-F "image=@portrait.jpg" \
-F "prompt=The person starts smiling and waves at the camera" \
-F "duration_seconds=6"
```
```python image_to_video.py
import requests
url = "https://tryvinci.com/api/v1/generate/image-to-video"
headers = {"Authorization": "Bearer sk-your-api-key-here"}
files = {"image": open("portrait.jpg", "rb")}
data = {
"prompt": "The person starts smiling and waves at the camera",
"duration_seconds": 6
}
r = requests.post(url, headers=headers, files=files, data=data)
r.raise_for_status()
print(r.json())
```
```javascript image_to_video.js
const fileInput = document.getElementById("imageInput");
const formData = new FormData();
formData.append("image", fileInput.files[0]);
formData.append("prompt", "The person starts smiling and waves at the camera");
formData.append("duration_seconds", "6");
const r = await fetch("https://tryvinci.com/api/v1/generate/image-to-video", {
method: "POST",
headers: { "Authorization": "Bearer sk-your-api-key-here" },
body: formData,
});
if (!r.ok) throw new Error(`HTTP ${r.status}`);
console.log(await r.json());
```
## Status Checking
```http title="Endpoint"
GET /api/v1/status/{request_id}
```
```http title="Authentication"
Authorization: Bearer sk-your-api-key-here
```
### Status responses
```json title="Pending"
{
"request_id": "req_abc123...",
"status": "pending",
"estimated_cost_usd": 0.25
}
```
```json title="Processing"
{
"request_id": "req_abc123...",
"status": "processing",
"estimated_cost_usd": 0.25,
"progress": 45
}
```
```json title="Completed"
{
"request_id": "req_abc123...",
"status": "completed",
"video_url": "https://storage.googleapis.com/vinci-dev/videos/generated_video.mp4",
"duration_seconds": 5.2,
"cost_usd": 0.26
}
```
```json title="Failed"
{
"request_id": "req_abc123...",
"status": "failed",
"error": "Invalid prompt format"
}
```
## Errors
| Status | Meaning | Action |
| ------ | -------------------- | --------------------------- |
| 401 | Invalid API key | Verify Authorization header |
| 402 | Insufficient balance | Add credits |
| 413 | File too large | Reduce image file size |
| 429 | Rate limit exceeded | Backoff and retry |
| 500 | Server error | Retry with backoff |
Warning
Always implement error handling and retry logic for production workloads.
# Billing & Usage
Source: https://docs.tryvinci.com/docs/guides/billing-usage
Check your balance, view usage stats, add safeguards, and handle insufficient balance errors.
Vinci uses a simple usage-based model. This guide shows how to query your balance and usage, add a quick balance guard before costly requests, and handle 402 errors.
Related:
* [Status Checking](/docs/api-reference/status-checking)
## Check balance
```http title="Endpoint"
GET /api/v1/billing/balance
```
```http title="Authentication"
Authorization: Bearer sk-your-api-key-here
```
```json title="Response"
{
"balance_usd": 25.50,
"total_spent_usd": 134.75
}
```
```curl cURL
curl -X GET "https://tryvinci.com/api/v1/billing/balance" \
-H "Authorization: Bearer sk-your-api-key-here"
```
```python check_balance.py
import requests
url = "https://tryvinci.com/api/v1/billing/balance"
headers = {"Authorization": "Bearer sk-your-api-key-here"}
r = requests.get(url, headers=headers)
r.raise_for_status()
balance = r.json()
print(f"Current balance: ${balance['balance_usd']:.2f}")
print(f"Total spent: ${balance['total_spent_usd']:.2f}")
if balance["balance_usd"] < 5.0:
print("⚠️ Low balance! Consider adding credits.")
```
```javascript check_balance.js
const r = await fetch("https://tryvinci.com/api/v1/billing/balance", {
headers: { "Authorization": "Bearer sk-your-api-key-here" },
});
if (!r.ok) throw new Error(`HTTP ${r.status}`);
const balance = await r.json();
console.log(`Current balance: $${balance.balance_usd.toFixed(2)}`);
console.log(`Total spent: $${balance.total_spent_usd.toFixed(2)}`);
if (balance.balance_usd < 5.0) {
console.log("⚠️ Low balance! Consider adding credits.");
}
```
## Usage statistics
```http title="Endpoint"
GET /api/v1/billing/usage?days={days}
```
```http title="Authentication"
Authorization: Bearer sk-your-api-key-here
```
```json title="Response"
{
"period_days": 30,
"total_requests": 156,
"total_seconds": 420.5,
"total_cost_usd": 21.025,
"current_balance_usd": 25.50,
"total_spent_usd": 134.75
}
```
```curl cURL
curl -X GET "https://tryvinci.com/api/v1/billing/usage?days=7" \
-H "Authorization: Bearer sk-your-api-key-here"
```
```python usage_stats.py
import requests
url = "https://tryvinci.com/api/v1/billing/usage?days=7"
headers = {"Authorization": "Bearer sk-your-api-key-here"}
r = requests.get(url, headers=headers)
r.raise_for_status()
usage = r.json()
print(f"Usage for last {usage['period_days']} days:")
print(f"- Total requests: {usage['total_requests']}")
print(f"- Total video seconds: {usage['total_seconds']}")
print(f"- Total cost: ${usage['total_cost_usd']:.2f}")
print(f"- Current balance: ${usage['current_balance_usd']:.2f}")
```
```javascript usage_stats.js
const r = await fetch("https://tryvinci.com/api/v1/billing/usage?days=7", {
headers: { "Authorization": "Bearer sk-your-api-key-here" },
});
if (!r.ok) throw new Error(`HTTP ${r.status}`);
const usage = await r.json();
console.log(`Usage for last ${usage.period_days} days:`);
console.log(`- Total requests: ${usage.total_requests}`);
console.log(`- Total video seconds: ${usage.total_seconds}`);
console.log(`- Total cost: $${usage.total_cost_usd.toFixed(2)}`);
console.log(`- Current balance: $${usage.current_balance_usd.toFixed(2)}`);
```
## Balance check helper
```python balance_check.py
import requests
def has_sufficient_balance(duration_seconds, api_key):
balance_url = "https://tryvinci.com/api/v1/billing/balance"
headers = {"Authorization": f"Bearer {api_key}"}
r = requests.get(balance_url, headers=headers)
r.raise_for_status()
balance = r.json()
estimated = duration_seconds * 0.05
return balance["balance_usd"] >= estimated
```
```javascript balance_check.js
async function hasSufficientBalance(durationSeconds, apiKey) {
const r = await fetch("https://tryvinci.com/api/v1/billing/balance", {
headers: { "Authorization": `Bearer ${apiKey}` },
});
if (!r.ok) throw new Error(`HTTP ${r.status}`);
const balance = await r.json();
const estimated = durationSeconds * 0.05;
return balance.balance_usd >= estimated;
}
```
Related
* [Status Checking](/docs/api-reference/status-checking)
## Handle insufficient balance (402)
```json title="Example 402 response"
{
"detail": "Insufficient balance. Current balance: $1.25, required: $2.50"
}
```
```python title="handle_402.py"
import requests
def request_video(prompt, duration, api_key):
url = "https://tryvinci.com/api/v1/generate/text-to-video"
headers = {"Authorization": f"Bearer {api_key}", "Content-Type": "application/json"}
data = {"prompt": prompt, "duration_seconds": duration}
r = requests.post(url, headers=headers, json=data)
if r.status_code == 402:
print(f"Insufficient balance: {r.json().get('detail')}")
return None
r.raise_for_status()
return r.json()
```
```javascript title="handle_402.js"
async function requestVideo(prompt, duration, apiKey) {
const url = "https://tryvinci.com/api/v1/generate/text-to-video";
const r = await fetch(url, {
method: "POST",
headers: {
"Authorization": `Bearer ${apiKey}`,
"Content-Type": "application/json",
},
body: JSON.stringify({ prompt, duration_seconds: duration }),
});
if (r.status === 402) {
const err = await r.json();
console.log(`Insufficient balance: ${err.detail}`);
return null;
}
if (!r.ok) throw new Error(`HTTP ${r.status}`);
return await r.json();
}
```
Info
For production, add retry with exponential backoff and alerts when balance falls below a threshold.
# Error Handling
Source: https://docs.tryvinci.com/docs/guides/error-handling
Common Vinci API errors and robust handling patterns for Python and JavaScript.
Build resilient clients with explicit handling for auth, balance, rate limits, and server errors.
## Common errors
| Status | Meaning | Suggested action |
| ------ | -------------------- | ------------------------------ |
| 400 | Bad request | Validate payload and types |
| 401 | Invalid API key | Fix Authorization header |
| 402 | Insufficient balance | Add credits, pre-check balance |
| 413 | Payload too large | Reduce file size or duration |
| 429 | Rate limit exceeded | Backoff and retry |
| 500 | Server error | Retry with exponential backoff |
## Request with retries
```python request_with_retries.py
import time
import requests
def request_with_retries(method, url, headers=None, **kwargs):
"""Basic retry policy with 429 and transient 5xx handling."""
backoff = 1.0
for attempt in range(5):
try:
r = requests.request(method, url, headers=headers, timeout=60, **kwargs)
if r.status_code == 429:
# Rate limit
time.sleep(backoff)
backoff = min(backoff * 2, 30)
continue
if 500 <= r.status_code < 600:
# Transient server error
time.sleep(backoff)
backoff = min(backoff * 2, 30)
continue
# Non-retry path
r.raise_for_status()
return r
except requests.exceptions.RequestException as e:
if attempt == 4:
raise
time.sleep(backoff)
backoff = min(backoff * 2, 30)
raise RuntimeError("Unreachable")
# Example usage
API_KEY = "sk-your-api-key-here"
headers = {"Authorization": f"Bearer {API_KEY}", "Content-Type": "application/json"}
url = "https://tryvinci.com/api/v1/generate/text-to-video"
data = {"prompt": "Calm ocean at sunrise", "duration_seconds": 5}
resp = request_with_retries("POST", url, headers=headers, json=data)
print(resp.json())
```
```javascript requestWithRetries.js
async function sleep(ms) { return new Promise(r => setTimeout(r, ms)); }
export async function requestWithRetries(fetchArgs, { retries = 4, baseDelay = 1000 } = {}) {
let delay = baseDelay;
for (let attempt = 0; attempt <= retries; attempt++) {
const res = await fetch(...fetchArgs);
if (res.status === 429 || (res.status >= 500 && res.status < 600)) {
if (attempt === retries) throw new Error(`HTTP ${res.status}`);
await sleep(delay);
delay = Math.min(delay * 2, 30000);
continue;
}
if (!res.ok) {
// Let caller examine details
const text = await res.text().catch(() => "");
throw new Error(`HTTP ${res.status} ${text}`);
}
return res;
}
throw new Error("Unreachable");
}
// Example usage
const API_KEY = "sk-your-api-key-here";
const url = "https://tryvinci.com/api/v1/generate/text-to-video";
const body = JSON.stringify({ prompt: "Snowy mountains", duration_seconds: 5 });
const res = await requestWithRetries([
url,
{ method: "POST", headers: { "Authorization": `Bearer ${API_KEY}`, "Content-Type": "application/json" }, body }
]);
console.log(await res.json());
```
## Handle known statuses
```python handle_known_statuses.py
import requests
def handle_known_statuses(r: requests.Response):
if r.status_code == 401:
raise PermissionError("Invalid API key. Check Authorization header.")
if r.status_code == 402:
detail = r.json().get("detail")
raise RuntimeError(f"Insufficient balance: {detail}")
if r.status_code == 413:
raise ValueError("File too large. Reduce the payload size.")
if r.status_code == 429:
raise RuntimeError("Rate limit exceeded. Retry with backoff.")
# Example
API_KEY = "sk-your-api-key-here"
headers = {"Authorization": f"Bearer {API_KEY}", "Content-Type": "application/json"}
url = "https://tryvinci.com/api/v1/generate/text-to-video"
data = {"prompt": "Forest in fog", "duration_seconds": 5}
r = requests.post(url, headers=headers, json=data)
if not r.ok:
handle_known_statuses(r)
r.raise_for_status()
print(r.json())
```
```javascript handleKnownStatuses.js
export async function handleKnownStatuses(res) {
if (res.status === 401) throw new Error("Invalid API key. Check Authorization header.");
if (res.status === 402) {
const j = await res.json().catch(() => ({}));
throw new Error(`Insufficient balance: ${j.detail ?? "Add credits"}`);
}
if (res.status === 413) throw new Error("File too large. Reduce payload size.");
if (res.status === 429) throw new Error("Rate limit exceeded. Retry with backoff.");
}
```
## Recommendations
* Always include Authorization header on every request.
* Pre-check balance before costly jobs (see Billing & Usage).
* Use exponential backoff and cap max retries.
* Log request\_id from creation responses to trace jobs.
# Getting Started
Source: https://docs.tryvinci.com/docs/guides/getting-started
A guided walkthrough to build your first Vinci workflow end-to-end.
This tutorial expands on the [Quickstart](/quickstart) by adding helpful context, checks, and best practices.
## 1) Create an API key and add credits
* Sign up at [https://app.tryvinci.com](https://app.tryvinci.com)
* Create an API key from [https://app.tryvinci.com/dashboard/api](https://app.tryvinci.com/dashboard/api)
* Add credits (video generation costs \$0.05 per second)
```http title="Authorization header"
Authorization: Bearer sk-your-api-key-here
```
Warning
Never store API keys in client-side code. Use environment variables or a secret manager.
## 2) Make your first generation request (Text-to-Video)
```curl cURL
curl -X POST "https://tryvinci.com/api/v1/generate/text-to-video" \
-H "Authorization: Bearer sk-your-api-key-here" \
-H "Content-Type: application/json" \
-d '{
"prompt": "A serene sunset over a calm lake",
"duration_seconds": 5,
"aspect_ratio": "16:9"
}'
```
```python generate.py
import requests
API_KEY = "sk-your-api-key-here"
url = "https://tryvinci.com/api/v1/generate/text-to-video"
headers = {"Authorization": f"Bearer {API_KEY}", "Content-Type": "application/json"}
data = {
"prompt": "A serene sunset over a calm lake",
"duration_seconds": 5,
"aspect_ratio": "16:9"
}
r = requests.post(url, headers=headers, json=data)
r.raise_for_status()
job = r.json()
print(job)
```
```javascript generate.js
const API_KEY = "sk-your-api-key-here";
const r = await fetch("https://tryvinci.com/api/v1/generate/text-to-video", {
method: "POST",
headers: {
"Authorization": `Bearer ${API_KEY}`,
"Content-Type": "application/json",
},
body: JSON.stringify({
prompt: "A serene sunset over a calm lake",
duration_seconds: 5,
aspect_ratio: "16:9",
}),
});
if (!r.ok) throw new Error(`HTTP ${r.status}`);
const job = await r.json();
console.log(job);
```
## 3) Poll the status endpoint
```curl cURL
curl -X GET "https://tryvinci.com/api/v1/status/your-request-id" \
-H "Authorization: Bearer sk-your-api-key-here"
```
```python poll.py
import time, requests
API_KEY = "sk-your-api-key-here"
request_id = "your-request-id"
status_url = f"https://tryvinci.com/api/v1/status/{request_id}"
headers = {"Authorization": f"Bearer {API_KEY}"}
while True:
r = requests.get(status_url, headers=headers)
r.raise_for_status()
s = r.json()
if s["status"] == "completed":
print("Video:", s["video_url"])
break
if s["status"] == "failed":
print("Generation failed")
break
print("Status:", s["status"])
time.sleep(5)
```
```javascript poll.js
const API_KEY = "sk-your-api-key-here";
const requestId = "your-request-id";
async function poll() {
const r = await fetch(`https://tryvinci.com/api/v1/status/${requestId}`, {
headers: { "Authorization": `Bearer ${API_KEY}` },
});
if (!r.ok) throw new Error(`HTTP ${r.status}`);
const s = await r.json();
if (s.status === "completed") {
console.log("Video:", s.video_url);
return;
}
if (s.status === "failed") {
console.log("Generation failed");
return;
}
console.log("Status:", s.status);
setTimeout(poll, 5000);
}
poll();
```
## 4) Common issues and tips
* 401 Unauthorized → Check Authorization header
* 402 Insufficient balance → Add credits
* 429 Rate limit → Backoff and retry
* Keep prompts clear and concise
* Use shorter durations for tests
For comprehensive guidance on writing effective prompts, see the [Prompting Guides](/docs/guides/prompting/index). These guides cover fundamental principles, text-to-image techniques, and image-to-image workflows that will help you get better results from all Vinci services.
## Next Steps
* **For better prompting**: Explore the [Prompting Guides](/docs/guides/prompting/index) to master prompt engineering
* **Continue with Essentials**: Learn about [Authentication and API Keys](/essentials/authentication)
* **API Reference**: See [Video Generation](/docs/api-reference/video-generation) for technical details
# Platform Service Stubs
Source: https://docs.tryvinci.com/docs/guides/platform/_stubs
Centralized reusable “Coming Soon” sections for incomplete details.
# Coming Soon
Details for this section are coming soon. If you need this sooner, contact Support via the top navigation or email [support@tryvinci.com](mailto:support@tryvinci.com).
# AI Actors
Source: https://docs.tryvinci.com/docs/guides/platform/ai-actors
Turn any image into a talking character with text or uploaded audio. Configure voices, lip-sync, and output options.
# AI Actors
Transform a static image into a talking character. Provide text or upload an audio file, select a voice, and Vinci will generate a lip‑synced speaking video.
Based on the current app implementation. Some advanced options are Coming Soon.
## Front-end controls
### Inputs
* Image: Upload character image (JPEG/PNG), minimum 512x512
* Dialogue:
* Text: Type your script
* Audio: Upload your own recorded audio
### Voice options
* Vinci Voices: Curated professional voices
* User Voices: Your voice clones created from audio samples
* Voice Selection Mode:
* “Vinci” (prebuilt)
* “User” (custom)
* Default fallback voice ID: `21m00Tcm4TlvDq8ikWAM`
### Output
* Duration: Auto from text/audio
* Format: MP4 (H.264/AAC)
* Resolution: 1080p default
### Advanced (defaults)
* Frame rate: 30 fps
* Batch size: 8
* CRF: 19 (quality)
* Audio processing: Automatic format detection/conversion
* Seed: Randomized
### Placeholders
* “Type your dialogue here…”
* “Click to type dialogue”
* “Search by voice, character, or workflow…”
## Typical workflow
### Choose a character
Upload a clear, well-lit portrait image (or select from your Character Library).
### Add dialogue
Type your script or upload an audio file. If you upload audio, text is optional.
### Pick a voice
Choose a Vinci voice or one of your User voice clones. Leave empty to use the default fallback.
### Generate and review
Start generation and monitor progress. Preview the output, then download or share.
## Best practices
* Use high-resolution faces with clear features
* Keep scripts concise and natural
* For uploads, provide clean audio (no background noise)
* Align language of the text/voice with target audience
* Test multiple voices to match character tone
## Asset libraries
* Characters: Pre‑made or uploaded (Images)
* Voices: Vinci library and your cloned voices
## Cost and usage
* Standard video pricing applies (see [Pricing](/essentials/pricing))
* Track usage via Billing (see [Billing & Usage](/docs/guides/billing-usage))
## Coming Soon
* Emotion/style controls
* Phoneme‑level timing controls
* Multi‑segment dialogue with pauses
# Emote
Source: https://docs.tryvinci.com/docs/guides/platform/emote
Animate a character image using a driving video to control motion and expressions.
# Emote
Bring a static character to life by applying motion from a driving video. Ideal for animated storytelling, character-based marketing, and education.
## Front-end controls
### Character
* Source: Upload image (JPEG/PNG) or select from Character Library
* Guidance: Use clear, front-facing images; minimum 512×512
### Driving video
* Source: Upload your reference motion video (MP4/MOV) or choose a template
* Purpose: Determines head/body movement and expressions
### Options
* Intensity: Low / Medium / High (Coming Soon)
* Stabilization: Auto (Coming Soon)
## Workflow
### Choose or upload a character
Pick from the Character Library or upload a high‑quality portrait with clear facial features.
### Add a driving video
Upload a motion reference clip or select a preset template for gestures and expressions.
### Configure options
Leave defaults to start. Increase motion intensity for more expressive results (Coming Soon).
### Generate and review
Start generation. Preview the animation, then download or share.
## Best practices
* Use well‑lit, high‑resolution character images
* Keep the driving video steady and well‑framed
* Match subject orientation between character and driving clip
* Test several driving templates to find the best style
## Asset libraries
* Characters: Pre‑made and user-uploaded
* Driving templates: Curated motions for common use cases
## Cost and usage
* Standard video pricing per generated second
* Track spend and balance at /docs/guides/billing-usage
## Coming Soon
* Motion intensity and smoothing sliders
* Background replacement and masking tools
# Image Generation
Source: https://docs.tryvinci.com/docs/guides/platform/image-generation
Create professional images from text prompts. Control dimensions, steps, guidance, and format.
# Image Generation
Generate images from descriptive text prompts. Adjust resolution, steps, guidance, and output format.
## Front-end controls
### Prompt
* Placeholder: “Describe the image you want to generate…”
### Parameters (defaults)
* Resolution: 1080x1920 (portrait)
* Steps: 25 (1–50)
* CFG scale: 7.5
* Seed: Random (42 default, customizable)
* Format: JPEG (PNG optional)
### Output
* Preview and download (JPEG/PNG)
* Save to Assets (Images)
* Share: Copy link, or post to social channels
### Templates
* Workflow templates by use case
* Aspect ratio presets for social networks
## Workflow
### Write a prompt
Be specific about subject, style, lighting, and composition.
### Tune parameters
Use defaults first. Increase steps for quality; adjust CFG for prompt adherence.
### Generate
Start generation, then review. Re‑roll with a new seed if needed.
### Export or iterate
Download the result or refine your prompt and generate variations.
## Best practices
* Keep prompts under \~200 characters for predictable results
* Use high-level style tags plus concrete details (camera, lighting)
* Prefer PNG when preserving transparency; JPEG for smaller filesize
* Pick aspect ratio templates that match your publishing channel
For comprehensive guidance on writing effective prompts, see the [Prompting Guides](/docs/guides/prompting/index). These guides cover fundamental principles, text-to-image techniques, and image-to-image workflows that will help you get better results from the Image Generation service.
### Prompting Resources
* [Prompting Tips](/docs/guides/prompting/prompting-tips) - Essential principles for all services
* [Text-to-Image Guide](/docs/guides/prompting/text-to-image) - Comprehensive techniques for image generation
* [Image-to-Image Guide](/docs/guides/prompting/image-to-image) - Advanced editing and style transfer methods
## Cost and usage
* Billed per image per model invocation
* Track spend and balance at [Billing & Usage](/docs/guides/billing-usage) and [Pricing](/essentials/pricing)
## Coming Soon
* Negative prompts and style strength sliders
* Batch grid and variation generator
# Platform Services
Source: https://docs.tryvinci.com/docs/guides/platform/index
Front-end guides for Vinci AI Studio workflows and user-facing options.
# Platform Services
Use these guides to configure and operate Vinci’s user-facing workflows. Each guide explains the front-end options, defaults, and best-practice flows. Where details are not yet available, the section is marked Coming Soon.
Turn any image into a talking character with text or uploaded audio, voice library, and voice cloning.
Create professional images from text with control over dimensions, steps, format, and guidance.
Generate videos from text or animate images; select aspect ratios and durations.
Translate videos with lip-sync preservation across languages.
Drive character motion using reference videos and character library.
Create branded QR codes for campaigns and connectivity.
## How these guides are structured
Each page lists visible controls, default values, placeholders, and selectable assets (voices, characters, templates).
Typical user flow using Vinci Studio: choose a workflow, configure parameters, generate, monitor progress, and manage outputs.
Tips for better outcomes, performance, and cost management.
If a control or option is missing from these guides but present in the app, prioritize the app behavior. Report gaps to Support so the docs can be updated.
# Platform Overview
Source: https://docs.tryvinci.com/docs/guides/platform/platform-overview
Explore page categories, workflow discovery, filtering, and the Vinci Studio experience.
# Platform Overview
Vinci AI Studio provides a unified environment to discover workflows, configure options, generate outputs, and manage assets.
## Explore page
* Categories: All Workflows, Video, Static, Labs, Publishing
* Discovery: Search by use case or keyword, filter by rating and difficulty
* Workflow cards: Thumbnail, description, badges, difficulty, star ratings
* Onboarding: Guided tour for new users
This page documents high-level UI capabilities; specific workflow controls live in each Platform Service guide.
## Typical Studio flow
### Discover
Use Explore to find a workflow by category, search, or template card.
### Configure
Open the workflow and set front-end options using defaults where appropriate.
### Generate
Start the job and monitor progress.
### Manage
Find results in Assets, then download or share as needed.
## Coming Soon
* Full filter reference (badges, difficulty, ratings)
* Saved searches and custom collections
# QR Code Generation
Source: https://docs.tryvinci.com/docs/guides/platform/qr-code-generation
Create custom, branded QR codes for campaigns and connectivity. Configure content, style, and export options.
# QR Code Generation
Generate branded QR codes for links, coupons, app downloads, or contact cards. Customize colors and logo, then export for print or digital use.
## Front-end controls
### Content
* Type: URL, Text, vCard (Coming Soon)
* Input: Paste link or text content
* Error correction: L / M / Q / H (default: M)
### Style
* Foreground color: Brand color
* Background color: Light/transparent
* Logo overlay: Upload PNG/SVG (Coming Soon)
## Workflow
### Enter content
Paste the target URL or text content. Keep URLs short and trustworthy.
### Customize the style
Pick brand foreground/background colors. Add a center logo when available.
### Generate and validate
Generate the QR and test with multiple devices. Ensure contrast warnings are resolved.
### Export
Download a high-resolution PNG for print or digital use. Save to Assets for reuse.
## Best practices
* Maintain high contrast between foreground and background
* Use error correction levels M–H when placing a center logo
* Test at the intended print size and typical scan distance
* Keep URLs short; consider branded short links
## Coming Soon
* SVG export and vector-safe logo placement
* vCard, Wi‑Fi, and deep link templates
# Video Generation
Source: https://docs.tryvinci.com/docs/guides/platform/video-generation
Generate videos from text or animate images. Choose aspect ratios, duration, and review status.
# Video Generation
Create videos from text prompts or animate static images into motion.
## Front-end controls
### Mode
* Text to Video
* Image to Video
### Common parameters
* Aspect Ratio: 16:9, 9:16, 1:1, 4:3, 3:4, 21:9
* Duration: 5–10 seconds (5s default)
* Seed: Random
* Quality: HD standard
### Text to Video
* Prompt: “Describe the video you want to generate…”
* Guidance: Style/creative guidance (optional)
### Image to Video
* Image: Upload JPEG/PNG
* Motion prompt: “Describe the motion you want to see in the image…”
## Workflow
### Select mode
Choose Text to Video or Image to Video.
### Set parameters
Pick aspect ratio and duration. Keep defaults for quick results.
### Provide input
* Text to Video: write your prompt
* Image to Video: upload an image and add a motion prompt
### Generate and monitor
Start generation. Watch progress and review the output.
### Save or share
Download, save to Assets, or share via link or social channels.
## Best practices
* Match aspect ratio to destination (e.g., 9:16 for Shorts/Reels; 16:9 for YouTube)
* Keep prompts concise and specific: motion, subject, camera, lighting
* Use shorter durations for experiments; scale up after you’re happy
## Cost and usage
* Charged per generated second (see [Pricing](/essentials/pricing))
* See [Billing & Usage](/docs/guides/billing-usage) to monitor spend and balance
## Coming Soon
* Negative prompt and style strength controls
* Keyframe motion presets and camera paths
# Video Translation
Source: https://docs.tryvinci.com/docs/guides/platform/video-translation
Translate videos across languages with lip‑sync preservation. Configure languages, voices, and output options.
# Video Translation
Upload a source video and generate a translated version with synchronized lip movements.
## Front-end controls
### Inputs
* Source video: MP4/MOV (clear speech recommended)
* Source language: Auto-detect or pick manually
### Target
* Target language: English, Spanish, French (expandable)
* Voice: Vinci Voices or your User voice clones
* Gender/tone: Optional selection when available
### Output
* Format: MP4 (H.264/AAC)
* Resolution: Preserve or normalize to 1080p
* Subtitles: Optional (burn‑in or sidecar .srt)
* Share: Link/social sharing
## Workflow
### Upload and detect
Upload your video. Let the system auto‑detect language or set it explicitly.
### Choose target
Pick the target language. Select a voice that matches your brand or speaker.
### Generate
Start translation. Speech is transcribed, translated, re‑synthesized, and lip‑synced.
### Review and export
Preview the output, toggle subtitles, then download or share.
## Best practices
* Use videos with clear speech and minimal background noise
* Keep the original pace; avoid highly overlapped speech
* For brand consistency, reuse the same target voice across translations
## Cost and usage
* Standard video pricing per generated second
* Track usage and balance at /docs/guides/billing-usage
## Coming Soon
* More languages and regional variants
* Voice style controls and prosody tuning
# Prompting Tips
Source: https://docs.tryvinci.com/docs/guides/prompting-tips
Write effective prompts for best video generation results.
> **Note:** This content has moved. See the consolidated prompting guides in [`docs/guides/prompting/prompting-tips.mdx`](docs/guides/prompting/prompting-tips.mdx) and the new deep-dive files: [`docs/guides/prompting/image-to-image.mdx`](docs/guides/prompting/image-to-image.mdx) and [`docs/guides/prompting/text-to-image.mdx`](docs/guides/prompting/text-to-image.mdx).
> Effective prompts improve quality and consistency.
## General guidance
* Be specific and descriptive
* Include movement, lighting, and style cues
* Avoid contradictory instructions
* Keep prompts under \~200 characters for best results
## Examples
* "A cinematic close-up of a hummingbird drinking nectar, golden hour lighting, shallow depth of field, smooth slow-motion"
* "Futuristic city skyline at night with neon lights, gentle camera pan, light rain, cyberpunk style"
Info
When using Image-to-Video, describe the intended motion relative to the source image, e.g., "subtle head turn and a friendly smile."
## Performance tips
* Poll status every 5–10 seconds
* Use exponential backoff for failures
* Cache final video URLs for reuse
* Prefer webhooks for production (see Webhooks guide)
# Prompting Guide - Image-to-Image
Source: https://docs.tryvinci.com/docs/guides/prompting/image-to-image
Detailed prompting best practices for image editing and style transfer.
Maximum prompt length is 512 tokens or about 2000 characters.
**Overview**
This guide consolidates best practices for editing images using Kontext-style image-to-image workflows.
## Basic Object Modifications
Kontext is effective for straightforward object modifications such as recolors, replacing objects, or minor retouching.
Example prompt:
"Change the color of the yellow car to deep cherry red while preserving reflections and highlights."
\[Placeholder image: Input image — add image here]
\[Placeholder image: Output image — add image here]
## Prompt Precision: From Basic to Comprehensive
Be explicit when you need precise control; concise prompts can sometimes change unintended aspects.
### Quick Edits
Simple prompts can work but may alter style or composition.
Prompt example:
"Change to daytime"
\[Placeholder image: Input image for quick edit]
\[Placeholder image: Output 1]
\[Placeholder image: Output 2]
### Controlled Edits
Add preservation instructions to keep style and composition similar to the input.
Prompt example:
"Change to daytime while maintaining the same style of the painting"
\[Placeholder image: Input image for controlled edit]
\[Placeholder image: Controlled edit output]
### Complex Transformations
For multiple simultaneous changes include clear, ordered instructions and prioritize the most important changes.
Prompt example:
"Change the setting to daytime, add several people walking on the sidewalk, keep the original painting style and composition"
\[Placeholder image: Input image for complex transform]
\[Placeholder image: Complex transform output]
## Style Transfer
Use direct style names, artist references, and descriptive characteristics.
### Using textual style prompts
1. Name the specific style (e.g., "Bauhaus", "watercolor", "film noir")
2. Reference artists or movements when appropriate
3. Describe key characteristics: brushstrokes, color palette, texture
4. Preserve composition if needed: "keep original composition and object placement"
\[Placeholder image: Architectural photo input]
\[Placeholder image: Output — pencil sketch]
\[Placeholder image: Output — oil painting]
### Using an input image as a style reference
Provide the style image as a reference and then describe the content you want in that style.
Prompt example:
"Using this style reference image, create a scene where a bunny, a dog, and a cat are having a tea party around a small white table."
\[Placeholder image: Style reference]
\[Placeholder image: Generated output using style reference]
## Iterative editing & character consistency
Kontext preserves character identity well when prompts explicitly request preservation.
Framework to maintain character consistency:
* Establish the reference: "The woman with short black hair and a mole on her left cheek..."
* Specify the transformation: environment, activity, or style
* Preserve identity markers: "maintain the same facial features, hairstyle and expression"
Example prompts in editing sequences:
1. "Remove the sunglasses from the woman's face while keeping expression unchanged"
2. "Place the same woman in a snowy street while preserving facial features and pose"
\[Placeholder image: Reference character]
\[Placeholder image: Iteration step 1 output]
\[Placeholder image: Iteration step 2 output]
## Text Editing in images
Use quotation marks around exact text you want to change.
Prompt structure:
Replace '\[original text]' with '\[new text]'
Example:
"Replace 'Choose joy' with 'Choose BFL' while maintaining original font, color and size"
\[Placeholder image: Sign with text 'Choose joy']
\[Placeholder image: Sign changed to 'Choose BFL']
Best practices for text edits:
* Use exact punctuation and casing
* Ask to preserve font, color, size, and layout when necessary
* Keep replacement text similar in length to avoid layout issues
## Visual cues & masks
Use visual markers, masks, or bounding descriptions to indicate where edits should occur.
Example:
"Add hats inside the three boxes drawn on the upper right quadrant"
\[Placeholder image: Input with boxes]
\[Placeholder image: Output with hats added]
## Troubleshooting: When results don't match expectations
* If the model changes parts you wanted preserved, explicitly state what should remain unchanged: "Keep everything else in the image identical"
* For character identity drift, enforce identity markers: "preserve exact facial features, hairstyle, eye color"
* If composition shifts unintentionally, state: "Keep the subject in the exact same position, scale, and pose"
### Composition control
Vague prompts like "put him on a beach" can change framing and camera angle.
Prefer:
"Change the background to a sunny beach while keeping the person in the exact same position, scale, pose, camera angle, framing and perspective. Only replace the environment around them."
\[Placeholder image: Composition input]
\[Placeholder image: Composition-preserved output]
### Style not applying correctly
Use richer style descriptions:
"Convert to pencil sketch with natural graphite lines, cross-hatching, and subtle paper texture"
\[Placeholder image: Input photo]
\[Placeholder image: Precise sketch output]
## Safety & Content Guidelines
* Avoid requesting generation of disallowed content (follow your platform's content policy)
* Obfuscate or avoid personal identifying edits if you do not have consent
## Best Practices Summary
* Be specific: use exact descriptors for color, lighting, and materials
* Start simple: make incremental changes and iterate
* Preserve intentionally: call out what must not change
* Use quotes for text edits: "Replace 'X' with 'Y'"
* Control composition explicitly: specify camera angle, framing, and subject placement
* Choose verbs carefully: "transform" often implies full replacement; "change the clothes" is more focused
Making instructions explicit helps accuracy; keep edits limited to a few clear directives per prompt.
\[Placeholder section for example prompts and executions — add example images and model responses here]
# Prompting Guides
Source: https://docs.tryvinci.com/docs/guides/prompting/index
Master the art of effective prompting for AI video and image generation with Vinci.
# Prompting Guides
Master the art of effective prompting to get the best results from Vinci's AI generation capabilities. These guides cover everything from basic principles to advanced techniques for text-to-image and image-to-image workflows.
Essential principles and best practices for writing effective prompts across all Vinci services.
Comprehensive guide for generating high-quality images from text descriptions with detailed control.
Advanced techniques for editing images, style transfer, and maintaining character consistency.
Complete guide to creating stunning videos with advanced camera movements and cinematography techniques.
## Getting Started
Whether you're creating your first AI-generated image or refining advanced techniques, these guides will help you understand how to communicate effectively with Vinci's AI models.
### Key Concepts
**Prompt Engineering**: The practice of crafting specific, detailed instructions that guide AI models to produce desired outputs.
**Context and Style**: How descriptive details, artistic styles, and technical parameters influence generation quality.
**Iteration and Refinement**: Techniques for improving results through systematic prompt adjustments.
Start with the Prompting Tips guide to understand fundamental principles, then explore specific workflows based on your use case.
# Prompting Tips
Source: https://docs.tryvinci.com/docs/guides/prompting/prompting-tips
Master the art of writing effective prompts for superior AI-generated content with Vinci.
# Prompting Tips
Master the art of writing effective prompts to unlock the full potential of Vinci's AI generation capabilities. This guide provides comprehensive best practices and practical examples to help you craft prompts that consistently yield high-quality results across all Vinci services.
While these tips are broadly applicable, remember that specific services like [Text-to-Image](/docs/guides/prompting/text-to-image) and [Image-to-Image](/docs/guides/prompting/image-to-image) may have their own nuances and advanced techniques.
## Core Principles of Effective Prompting
Before diving into specific tips, it's essential to understand the foundational principles that govern all effective prompting.
### Clarity and Specificity
The most common reason for unsatisfactory AI outputs is ambiguity. The more precise and unambiguous your prompt, the more likely the AI will generate content that matches your vision.
**Why Specificity Matters:**
AI models interpret language based on patterns and associations. Vague terms can lead to unpredictable results, while specific descriptions provide clear guidance.
**From Vague to Specific:**
* **Vague:** "A dog"
* **Better:** "A golden retriever"
* **Best:** "A golden retriever sitting in a sunny meadow, looking directly at the camera with its tongue out"
### Structure and Organization
Well-organized prompts help the AI understand what elements are most important and how they relate to each other.
**Recommended Structure:**
1. **Subject** - What is the main focus?
2. **Action** - What is happening?
3. **Environment** - Where is this taking place?
4. **Style** - What visual style or aesthetic?
5. **Technical details** - Any specific requirements?
## Essential Prompting Techniques
### Use Descriptive Language
Replace generic terms with specific, descriptive language:
* Instead of "beautiful," use "elegant," "stunning," or "breathtaking"
* Instead of "big," use "massive," "towering," or "enormous"
* Instead of "colorful," specify actual colors like "vibrant purple and gold"
### Include Context and Setting
Provide environmental context to create more immersive and realistic outputs:
```text
"A cozy coffee shop interior with warm lighting, exposed brick walls,
vintage furniture, and steam rising from a cup of coffee on a wooden table"
```
### Specify Technical Parameters
When relevant, include technical details:
* **Lighting:** "soft natural lighting," "dramatic shadows," "golden hour"
* **Camera angle:** "wide shot," "close-up," "bird's eye view"
* **Style:** "photorealistic," "artistic," "minimalist"
## Common Prompting Mistakes
Avoid these common pitfalls that can negatively impact your results.
### Overcomplicating Prompts
While detail is important, overly complex prompts can confuse the AI. Find the right balance between specificity and clarity.
**Too Complex:**
```text
"An extremely photorealistic image of a majestic golden retriever with flowing fur
that catches the light beautifully while sitting gracefully in a perfectly manicured
meadow filled with exactly seventeen different types of wildflowers..."
```
**Better:**
```text
"A golden retriever sitting in a sunny wildflower meadow,
photorealistic style, soft natural lighting"
```
### Contradictory Instructions
Avoid providing conflicting directions within the same prompt:
* Don't ask for both "minimalist" and "highly detailed"
* Don't request "vintage" and "futuristic" unless specifically for contrast
### Negative Language
Instead of describing what you don't want, focus on what you do want:
* **Avoid:** "Not blurry, not dark, not cluttered"
* **Better:** "Sharp focus, bright lighting, clean composition"
## Advanced Techniques
### Prompt Chaining
For complex scenes, break your prompt into logical components:
1. **Main subject:** "A professional chef"
2. **Action:** "preparing fresh pasta"
3. **Environment:** "in a modern restaurant kitchen"
4. **Mood:** "focused and passionate expression"
5. **Style:** "documentary photography style"
### Using References
When appropriate, reference well-known styles or artists (for non-copyrighted work):
* "In the style of classical portrait photography"
* "Minimalist architectural photography"
* "Vintage travel poster aesthetic"
### Iterative Refinement
Don't expect perfect results on the first try. Use an iterative approach:
1. Start with a basic prompt
2. Identify what needs improvement
3. Add specific details to address those areas
4. Test and refine further
## Platform-Specific Considerations
### For Image Generation
* Include aspect ratio preferences when relevant
* Specify image quality expectations
* Consider composition and framing
### For Video Generation
* Think about movement and transitions
* Consider duration and pacing
* Include audio considerations if applicable
## Testing and Optimization
### Keep a Prompt Journal
Document what works and what doesn't:
* Successful prompts and their results
* Failed attempts and lessons learned
* Variations that led to improvements
### A/B Testing
Try variations of the same concept:
* Different adjectives for the same subject
* Various lighting conditions
* Alternative composition styles
The key to mastering prompting is practice and experimentation. Start with these fundamentals and gradually develop your own style and techniques.
## Next Steps
Ready to apply these principles? Explore these specialized guides:
Detailed techniques for generating images from text descriptions
Advanced methods for editing and transforming existing images
# Prompting Guide - Text-to-Image
Source: https://docs.tryvinci.com/docs/guides/prompting/text-to-image
Master the art of generating stunning images from text prompts with Vinci's comprehensive guide.
# Text-to-Image Prompting Guide
Maximum prompt length: 512 tokens. While you can use the full budget, shorter, more focused prompts are often easier to iterate and refine effectively. Start with the core concept and build up.
## Overview
Welcome to the definitive guide for text-to-image generation with Vinci. This comprehensive resource consolidates best practices from leading AI image generation models, including FLUX Kontext, Vertex AI, and Runway, and adapts them specifically for the Vinci ecosystem. Whether you're creating photorealistic portraits, fantastical concept art, or product mockups, this guide will equip you with the knowledge to craft prompts that consistently yield high-quality, accurate, and creative results.
This guide covers everything from fundamental prompt structure and advanced photographic techniques to style control, negative prompting, and efficient iterative workflows. By the end of this guide, you'll be able to translate even the most complex creative visions into detailed AI-generated images.
For fundamental prompting principles that apply to all Vinci services, see the [Prompting Tips](/docs/guides/prompting/prompting-tips) guide. This guide assumes you're familiar with those core concepts and dives deeper into the specifics of text-to-image generation.
## The Anatomy of a Perfect Text-to-Image Prompt
A well-structured prompt acts as a comprehensive blueprint for the AI, guiding it through every aspect of the image you want to create. While there's no single "correct" way to write a prompt, a reliable and effective structure typically includes these components in a logical order.
### 1. The Core Subject
This is the foundation of your image. Clearly and specifically define the main focus, character, or object.
*Example: "A majestic lion with a flowing golden mane"*
### 2. Subject Attributes & Details
Elaborate on your subject's appearance, characteristics, and actions. Use vivid adjectives.
*Example: "...intelligent green eyes, powerful stance, muscles rippling under its fur"*
### 3. Environment & Setting
Place your subject in a specific context. Describe the location, time of day, weather, and background.
*Example: "...on a rocky outcrop overlooking the vast African savannah at sunset"*
### 4. Composition & Perspective
Direct the AI on how to frame and view the subject. This is crucial for controlling the image's focus and impact.
*Example: "...low-angle shot, rule of thirds, wide-angle lens to emphasize the grandeur"*
### 5. Lighting & Atmosphere
Define the mood and visual tone through lighting. This can dramatically change the feeling of your image.
*Example: "...dramatic golden hour lighting, long shadows, warm and epic atmosphere"*
### 6. Artistic Style & Medium
Specify the desired aesthetic. This is where you control whether the image looks like a photo, painting, or something entirely different.
*Example: "...hyperrealistic, National Geographic wildlife photography style"*
### 7. Quality & Detail Enhancers
Add final polish with keywords that boost the overall quality and level of detail.
*Example: "...ultra-detailed, 8k resolution, sharp focus, highly detailed fur texture"*
### 8. Negative Prompts
Explicitly state what you want to exclude from the image. This is your most powerful tool for refining outputs.
*Example: "Negative prompt: blurry, distorted, low quality, text, watermark, ugly"*
**Putting It All Together:**
"A majestic lion with a flowing golden mane and intelligent green eyes, in a powerful stance with muscles rippling under its fur, on a rocky outcrop overlooking the vast African savannah at sunset, low-angle shot using the rule of thirds with a wide-angle lens to emphasize grandeur, dramatic golden hour lighting creating long shadows, warm and epic atmosphere, hyperrealistic, National Geographic wildlife photography style, ultra-detailed, 8k resolution, sharp focus, highly detailed fur texture. Negative prompt: blurry, distorted, low quality, text, watermark, ugly, extra limbs, deformed eyes."
## Mastering Photorealism: Camera, Lens, and Photography Cues
When aiming for a photorealistic look, incorporating photographic terminology can significantly improve the AI's ability to mimic real-world camera behavior and lens effects. These cues provide technical specifications that guide the AI toward a more authentic result.
### Essential Photography Terminology
* **Lens Types:**
* *Portrait:* "85mm lens" (natural compression, pleasing bokeh), "50mm lens" (versatile, slightly wide)
* *Landscape:* "wide-angle 24mm" (expansive view), "16-35mm zoom"
* *Telephoto:* "200mm lens" (compresses distance, good for wildlife)
* **Aperture & Depth of Field:**
* *Shallow DOF:* "f/1.8 shallow depth of field" (blurs background, isolates subject), "f/2.8"
* *Deep DOF:* "f/8 for landscape sharpness" (everything in focus), "f/11"
* **Camera & Film/Sensor:**
* *Camera Brands:* "shot on a Hasselblad" (high-end, medium format), "DSLR", "mirrorless camera"
* *Film Stocks:* "Kodak Portra 400" (natural skin tones, vibrant colors), "Fujifilm Pro 400H" (cinematic, muted tones), "Ilford HP5" (black and white, grainy)
* *Digital Sensors:* "full-frame sensor", "45-megapixel resolution"
* **Post-Processing Effects:**
* *Film Grain:* "subtle film grain", "35mm film grain"
* *Emulation:* "soft film emulation", "Kodak Portra color grading"
* *Sharpening/Noise:* "subtle sharpening", "low noise", "clean image"
**Example Prompt:**
"A close-up portrait of an elderly woman with freckled skin and kind wrinkles, soft rim lighting from a window, shot on an 85mm lens at f/1.8, creating a beautiful shallow depth of field that blurs the background. Fujifilm Pro 400H color palette, natural skin tones, subtle film grain. Photorealistic, ultra-detailed, sharp focus on the eyes."
\[Placeholder image: Example of a portrait prompt with photographic cues -> a photorealistic portrait output]
## Composition and Framing: Directing the Viewer's Eye
How you compose your image determines its visual impact and storytelling power. Be explicit about subject placement, framing, and the overall layout to guide the AI in creating a well-balanced and engaging image.
### Key Composition Concepts
* **Composition Rules:**
* "Rule of thirds": Place key elements along imaginary lines dividing the image into thirds.
* "Centered subject": Creates a sense of symmetry and importance.
* "Leading lines": Use natural lines (roads, rivers, fences) to draw the eye to the subject.
* "Negative space": Use empty areas to create a sense of scale or minimalism.
* **Shot Types & Framing:**
* "Extreme close-up": Focuses on a small detail (e.g., an eye, a texture).
* "Close-up": Typically frames a person's head and shoulders.
* "Medium shot": Frames a person from the waist up.
* "Full body": Shows the entire subject.
* "Wide shot" or "Establishing shot": Shows the subject and their environment.
* "Overhead shot" or "Bird's-eye view": Shot from directly above.
* **Aspect Ratios:**
* Specify the desired output format: "1:1" (square), "16:9" (widescreen), "9:16" (vertical, for mobile/Instagram), "4:5" (standard social media).
* **Scale and Distance:**
* "Epic scale", "monumental", "tiny figure in a vast landscape" to convey size relationships.
* "Intimate framing", "close-up details" to focus on small elements.
**Example Prompt:**
"A wide-angle cinematic landscape of a lone tree on a hill at sunset, subject placed using the rule of thirds, vast sky with dramatic clouds, leading lines from a winding road drawing the eye to the tree, 16:9 aspect ratio, epic and serene atmosphere."
## Exploring Artistic Styles: From Realism to Abstraction
One of the most exciting aspects of AI image generation is its ability to emulate a vast array of artistic styles. Moving beyond simple "realistic" or "cartoon" opens up endless creative possibilities.
### Style Categories and Examples
* **Impressionism:** "Soft brushstrokes, visible texture, play of light, inspired by Monet"
* **Cubism:** "Geometric shapes, multiple perspectives, fragmented forms, inspired by Picasso"
* **Surrealism:** "Dreamlike, illogical scenes, melting clocks, inspired by Dalí"
* **Art Nouveau:** "Organic flowing lines, floral motifs, whiplash curves"
* **Bauhaus:** "Geometric abstraction, primary colors, functional design"
* **Cyberpunk:** "Neon-noir, dystopian future, high-tech low-life, rain-slicked streets"
* **Steampunk:** "Victorian-era technology, brass and gears, steam-powered machinery"
* **Fantasy:** "Epic, magical creatures, castles, otherworldly landscapes"
* **Horror:** "Gothic, eerie, suspenseful, dark and moody"
* **Romanticism:** "Dramatic, emotional, sublime landscapes, inspired by Turner"
* **Painting:** "Oil painting with visible knife strokes", "watercolor with soft bleeds", "acrylic on canvas"
* **Drawing:** "Charcoal sketch", "ink wash", "pencil drawing on textured paper"
* **Digital Art:** "Digital painting", "3D render, octane, cinematic lighting", "concept art"
* **Photography:** "Long exposure", "black and white film", "infrared photography"
### Referencing Artists and Styles
* **Direct References (Use with caution):** "In the style of Van Gogh," "Picasso's cubist period." Be aware that some platforms may have restrictions on direct artist emulation.
* **Descriptive Attributes (Safer & often more effective):** Instead of naming an artist, describe their key characteristics.
* *Instead of:* "In the style of Van Gogh"
* *Try:* "Thick impasto brushstrokes, vibrant swirling colors, dramatic emotional intensity, post-impressionist style"
* **Combining Styles:** Feel free to mix and match for unique results.
* "A cyberpunk city rendered in the style of a watercolor painting"
* "A fantasy landscape with Art Nouveau floral elements"
**Example Prompt:**
"A whimsical watercolor painting of woodland animals having a tea party, soft pastel colors, visible paper texture, delicate brushstrokes with a hint of ink outlines, warm ambient light, storybook illustration style, charming and magical atmosphere."
## The Power of Color, Material, and Lighting
These elements define the mood, texture, and realism of your image. Precise language here is key to achieving the exact visual you envision.
### Color Palette Guidance
* **Specific Color Names:** "Deep cherry red," "muted teal," "sunset orange," "forest green," "charcoal gray."
* **Color Moods:**
* *Vibrant/Jewel Tones:* "Saturated colors," "jewel-toned palette," "high contrast"
* *Pastel/Muted:* "Soft pastel palette," "muted earth tones," "desaturated colors"
* *Monochromatic:* "Shades of blue," "black and white with a single accent color"
* **Color Grading:** "Cinematic color grading," "teal and orange look," "moody blue tones," "warm golden hues."
### Material and Texture Description
* **Materials:** "Matte ceramic," "polished chrome," "rough-hewn stone," "velvet fabric," "weathered wood."
* **Textures:** "Glossy surface," "rough texture," "smooth and reflective," "woven fabric," "icy surface."
* **Finishes:** "Satin finish," "matte black," "high-gloss," "brushed metal."
### Lighting Techniques
* **Direction of Light:**
* "Frontal lighting": Even illumination, good for portraits.
* "Backlighting" or "Rim lighting": Creates a halo effect around the subject.
* "Side lighting": Creates dramatic shadows and highlights texture.
* **Quality of Light:**
* "Hard light": Creates sharp, defined shadows (e.g., direct sunlight).
* "Soft light": Creates gentle, diffused shadows (e.g., overcast day, studio softbox).
* **Time of Day & Atmospheric Effects:**
* "Golden hour": Warm, soft light shortly after sunrise or before sunset.
* "Blue hour": Cool, tranquil light just before sunrise or after sunset.
* "Dramatic chiaroscuro": Strong contrast between light and dark.
* "Neon glow," "volumetric lighting," "god rays" (beams of light).
**Example Prompt:**
"Product shot of a matte black wireless headphone on a minimal white marble pedestal, polished chrome accents, softbox frontal lighting for even illumination, 45-degree angle to show form, high detail on materials, studio photography style, clean and minimalist aesthetic."
## The Iterative Refinement Workflow: From Concept to Perfection
Mastering the iterative process is the single most important skill for a proficient prompt engineer. Very few people get the perfect result on the first try. The goal is to use each generation as a stepping stone to refine your vision.
### A Step-by-Step Iterative Process
### Step 1: Establish the Core Concept
Start with a simple, clear prompt that defines the main subject and basic composition. This is your "proof of concept."
*Example: "A cat sitting on a windowsill"*
### Step 2: Analyze the Output
Critically evaluate the generated image. What did the AI get right? What's wrong? What's missing? Be specific.
*Self-Correction Thoughts: "The cat looks generic. The background is plain. The lighting is flat."*
### Step 3: Add Layers of Detail
Based on your analysis, add one or two new elements to your prompt. Don't change everything at once. This helps you understand the impact of each new keyword.
*Example Addition: "A fluffy ginger Maine Coon cat..."*
### Step 4: Refine Style and Mood
Now that the subject is better, focus on the aesthetic. Add style, lighting, and atmosphere keywords.
*Example Addition: "...sitting on a vintage wooden windowsill, looking out at a rainy city street at night, reflections of neon lights on the wet glass, soft natural light from the window illuminating the cat's fur..."*
### Step 5: Use Negative Prompts to Clean Up
If there are persistent unwanted elements (e.g., blurry text, extra limbs), add them to a negative prompt.
*Negative Prompt: "blurry, distorted, low quality, ugly, bad anatomy, people, buildings, text, watermark"*
### Step 6: Final Polish and High-Resolution Render
Once you're happy with the composition and style, run a final high-resolution generation with your best prompt.
*Final Prompt: "A fluffy ginger Maine Coon cat with bright green eyes, sitting on a vintage wooden windowsill, looking out at a rainy city street at night, reflections of neon lights on the wet glass, soft natural light from the window illuminating the cat's fur, shallow depth of field, photorealistic, highly detailed, cinematic mood"*
## Advanced Techniques and Tools
Once you're comfortable with the basics, these advanced techniques can help you achieve even more sophisticated results.
### Controlling Complexity and Managing the Token Budget
* **Start Simple, Add Complexity:** As described in the iterative workflow, build your prompt gradually.
* **Use Seeds for Reproducibility:** If you find a base result you like, use the same "seed" value (if offered by the platform) to generate variations while keeping the core composition similar.
* **"Variations" Feature:** Use built-in variation tools to explore different takes on a successful prompt without starting from scratch.
* **Break Down Complex Scenes:** For extremely complex scenes, consider generating separate elements (e.g., a character, a background) and then combining them in an image editor.
### The Art of Negative Prompting
Negative prompts are not just for fixing errors; they are a proactive tool for steering the AI away from styles or elements you explicitly don't want.
* **Common Negative Prompt Categories:**
* *Quality/Artifacts:* `blurry, distorted, deformed, ugly, low quality, bad anatomy, extra limbs, fused fingers, poorly drawn hands, mutated, disfigured, jpeg artifacts, noise`
* *Style/Format:* `cartoon, painting, sketch, 3D, illustration, watermark, text, signature, username, artist name`
* *Content:* `people, person, animals, building, car` (use when you want to exclude these)
* *Composition:* `cropped, out of frame, worst quality, low quality, normal quality, jpeg artifacts, signature, watermark, username, blurry`
* **Tailoring Negatives:** Your negative prompt should be specific to the issues you're seeing. If you're getting cartoonish results for a photo, add `no cartoon style, no illustration`.
### Advanced Modifiers and Tokens
* **Quality Tokens:** "masterpiece," "best quality," "ultra-detailed," "highly detailed," "8k," "sharp focus," "intricate details."
* **Lighting Tokens:** "cinematic lighting," "dramatic rim lighting," "studio lighting," "volumetric lighting," "god rays."
* **Style Tokens:** "trending on artstation," "unreal engine," "octane render," "cinematic."
* **Avoiding Contradictions:** Be careful not to use conflicting terms (e.g., "low-detail" and "ultra-detailed" in the same prompt). The AI may get confused or ignore one of them.
* **Token Budget Awareness:** Remember the 512-token limit. Very long, complex prompts may get truncated, which can lead to unexpected results. Prioritize the most important elements.
## Troubleshooting Common Issues
Even the best prompters run into problems. Here's a quick reference guide to diagnosing and fixing common issues.
| Symptom | Probable Cause | Solution |
| :------------------------------ | :------------------------------------------------------------------- | :---------------------------------------------------------------------------------------------------------------------------------------------------------------- |
| **Blurry or Low-Quality Image** | Insufficient detail keywords, prompt too complex, model limitations. | Add quality boosters: "ultra-detailed," "sharp focus," "8k." Simplify the prompt if it's overly complex. Try upscaling if available. |
| **Faces or Hands are Deformed** | A common AI weakness, especially with complex prompts. | Use negative prompts: "no deformed hands, no extra fingers, natural anatomy." Try generating a close-up of just the face/hands first. |
| **Wrong Art Style** | Failure to specify style, or conflicting style keywords. | Be explicit about the desired style. Use negative prompts to exclude unwanted styles (e.g., "no cartoon"). Avoid mixing contradictory styles. |
| **Unwanted Elements Appear** | AI "hallucination," not using negative prompts effectively. | Use negative prompts with specific terms. Refine your positive prompt to be more specific about what should and shouldn't be in the scene. |
| **Colors are Not as Expected** | Vague color descriptions, lighting overriding color intent. | Specify exact colors or color palettes. Describe lighting separately from color. Use negative prompts like "no muted colors" if needed. |
| **Composition is Off** | Poor composition description, subject not prioritized. | Start with the subject. Use explicit composition keywords: "rule of thirds," "close-up," "centered subject." Use negative prompts to remove distracting elements. |
## Comprehensive Example Gallery
Let's put all these principles into practice with a series of detailed examples.
### Example 1: Cinematic Environmental Portrait
**Goal:** A dramatic, moody portrait of a character in a specific environment.
**Prompt:**
"A close-up portrait of a weathered fisherman in his 60s, deep wrinkles and a salt-and-pepper beard, wearing a yellow oilskin jacket, intense blue eyes looking directly at the camera, dramatic side lighting from a single lantern, creating deep shadows and highlighting his rugged features, on the deck of a fishing boat at night during a storm, waves crashing in the background, salt spray on his face, hyperrealistic, cinematic, shot on a 85mm lens, shallow depth of field, high detail, National Geographic style. Negative prompt: blurry, distorted, low quality, text, watermark, cartoon, ugly."
### Example 2: Fantasy Concept Art
**Goal:** A heroic character in a fantastical setting.
**Prompt:**
"A majestic elven ranger with long silver hair and intricate leaf-shaped armor, holding a glowing bow made of living wood, standing in an ancient, bioluminescent forest at twilight, giant mushrooms and glowing vines surrounding her, ethereal blue and purple light emanating from the plants, misty atmosphere, digital painting, highly detailed, fantasy art, style of Alan Lee and Greg Rutkowski, epic scale. Negative prompt: blurry, deformed, low quality, text, watermark, photorealistic, modern clothing."
### Example 3: Minimalist Product Photography
**Goal:** A clean, professional product shot for an e-commerce site.
**Prompt:**
"Minimalist product shot of a pair of sleek, wireless earbuds in matte black, placed on a simple white marble surface, soft, even studio lighting from above, no shadows, extreme close-up to highlight the texture and design, clean and modern aesthetic, studio photography, 8k resolution, sharp focus, ultra-detailed. Negative prompt: blurry, distorted, low quality, text, watermark, reflections, dust, fingerprints."
### Example 4: Stylized Illustration for Children's Book
**Goal:** A charming, colorful illustration.
**Prompt:**
"A whimsical illustration of a friendly fox reading a book under a large toadstool in a magical forest, soft pastel colors, gentle watercolor style with visible pencil lines, warm and inviting atmosphere, storybook art, charming and cute, detailed background with tiny flowers and fireflies. Negative prompt: scary, dark, realistic, photorealistic, text, watermark, sharp edges."
## Prompt Bank: Ready-to-Use Templates
Use these as starting points and adapt them to your specific needs.
### Photo-Realistic Portraits
* **Template:** "A \[age] \[gender] \[ethnicity] with \[hair color] and \[eye color], \[distinctive feature], \[expression], \[lighting setup], shot on a \[lens] lens, \[depth of field], \[film stock/color palette], photorealistic, ultra-detailed, sharp focus on the eyes."
* **Example:** "A 30-year-old woman of East Asian descent with long black hair and warm brown eyes, a small beauty mark on her cheek, a gentle smile, soft natural light from a large window, shot on an 85mm lens, f/1.8 shallow depth of field, Kodak Portra 400 color palette, photorealistic, ultra-detailed, sharp focus on the eyes."
### Environmental Concept Art
* **Template:** "A \[setting] at \[time of day/weather], \[key environmental elements], \[subject/character] doing \[action], \[art style], \[lighting/atmosphere], \[quality modifiers]."
* **Example:** "A futuristic cyberpunk city street at night during a heavy rain, neon signs reflecting on wet asphalt, steam rising from grates, a lone figure in a long coat walking with their back to the camera, digital painting, cinematic neon lighting, volumetric fog, highly detailed, concept art style."
### Product Mockups and Advertising Shots
* **Template:** "Product shot of a \[product] in \[color/material], on a \[surface/background], \[lighting setup], \[camera angle], \[style], \[quality modifiers]. No text, no watermark."
* **Example:** "Product shot of a minimalist ceramic mug in matte white, on a concrete pedestal in a bright studio, softbox lighting from three directions, 45-degree angle to show the handle, studio photography, clean and modern aesthetic, 8k resolution, ultra-detailed. No text, no watermark."
### Stylized Character Concepts
* **Template:** "A \[character archetype] with \[key physical features], wearing \[outlier/armor], \[expression/pose], in a \[stylic environment], \[art style/artist reference], \[color palette], \[mood/atmosphere], highly detailed."
* **Example:** "A wise old wizard with a long white beard and glowing blue eyes, wearing ornate robes covered in celestial patterns, holding a crystal-topped staff, standing on a cliff overlooking a starry valley, fantasy digital painting, style of Frank Frazetta, rich deep blues and golds, mystical and powerful atmosphere, highly detailed."
## Best Practices Summary
* **Be Explicit:** The more specific you are, the better the AI can understand and execute your vision.
* **Iterate Relentlessly:** Start simple and add complexity gradually. Use each generation as a learning opportunity.
* **Structure Your Prompts:** Use a logical order (Subject -> Attributes -> Environment -> Composition -> Style -> Lighting -> Quality).
* **Master Negative Prompts:** Use them proactively to exclude unwanted elements and refine your results.
* **Learn the Language of Photography and Art:** Incorporate technical terms to achieve specific aesthetic effects.
* **Experiment and Have Fun:** The best way to learn is by trying new things and seeing what works.
The most successful prompters treat AI image generation as a collaborative partner. You provide the vision and direction; the AI provides the execution. The better your communication (your prompt), the better the partnership.
## Related Resources
### Related Prompting Guides
* [Prompting Tips](/docs/guides/prompting/prompting-tips) - Fundamental principles for all services
* [Image-to-Image Guide](/docs/guides/prompting/image-to-image) - Advanced editing and style transfer
* [Prompting Guides Index](/docs/guides/prompting/index) - Complete prompting resources
### Platform Integration
* [Image Generation Platform Guide](/docs/guides/platform/image-generation) - Front-end workflows
* [Platform Services Overview](/docs/guides/platform/index) - All Vinci platform features
### API Documentation
* [Video Generation API](/docs/api-reference/video-generation) - Implementation details
* [Status Checking](/docs/api-reference/status-checking) - Monitor generation progress
* [Error Handling](/docs/guides/error-handling) - Troubleshoot common issues
### Getting Started
* [Quickstart Guide](/quickstart) - First API call in 5 minutes
* [Getting Started Tutorial](/docs/guides/getting-started) - Comprehensive walkthrough
* [Authentication & API Keys](/essentials/authentication) - Setup and security
Remember that text-to-image prompting techniques and model capabilities may evolve over time. Always refer to the latest Vinci service documentation for the most accurate and up-to-date information, and stay engaged with the community to discover new tips and tricks.
# Video Generation Prompt Guide
Source: https://docs.tryvinci.com/docs/guides/prompting/video-generation
A comprehensive guide to creating stunning videos with Vinci's AI-powered video generation platform.
This guide provides comprehensive instructions and best practices for creating high-quality videos using Vinci's advanced video generation platform. By understanding the various prompting techniques and creative parameters, you can achieve precise control over your video outputs, from basic actions to complex camera movements and aesthetic styles.
## Platform Capabilities
Vinci's video generation platform supports both Text-to-Video and Image-to-Video creation, offering a complete range of creative possibilities:
* Basic to advanced camera movements and shot compositions
* Character interactions and environmental storytelling
* Focus control and depth of field effects
* Multi-shot sequences with sophisticated transitions
* Character transformations and metamorphosis effects
* Professional cinematography techniques
### Text-to-Video
Create videos directly from your written descriptions. This approach gives you complete creative freedom to build scenes and narratives through detailed prompts.
### Image-to-Video
Transform your static images into dynamic video sequences. Perfect for bringing existing visuals to life or adding motion to still content.
## Creative Controls
The following parameters give you precise control over your video creation process.
### Your Creative Prompt
This is where you describe exactly what you want to create. Use natural language to tell your story, describe actions, set the scene, and direct the camera.
#### Basic Actions
Describe the subject and their action.
**Examples:**
* `A man walking in a park.`
* `The man turns his head and smiles at the camera.`
* `A woman picks up the wine glass in front of her, takes a sip, puts it down.`
#### Multiple Action Commands
You can specify sequential actions for a single character or multiple characters.
**Examples:**
* `A man walks, then runs, then jumps.`
* `A dog barks, and a cat meows.`
* `The steady and indifferent boy looks at the camera and takes off his earphones. Then he jumps off the tire, walks toward the camera, and squats down.`
#### Character Interaction and Emotional Scenes
Create compelling character-driven narratives with emotional depth.
**Examples:**
* `The woman was crying and drinking, and a man came in to comfort her.`
* `Kittens and puppies eat cat food. **Shot Switch.** Close-up cat food is distinct.`
#### Camera Language
Control camera movements and perspectives with precision.
##### Basic Camera Movements
* `push` / `the camera quickly pushes in`: Camera moves forward into the scene
* `pull` / `the camera quickly pulls back`: Camera moves backward away from the scene
* `pan` / `the camera pans right`: Camera rotates horizontally from a fixed position
* `track` / `the camera tracks right`: Camera moves horizontally alongside the subject
* `orbit` / `the camera orbits around`: Camera circles around the subject
* `follow` / `the camera follows`: Camera moves behind the subject, maintaining distance
* `rise` / `the camera gradually rises`: Camera moves vertically upwards
* `descend` / `the camera tilts down`: Camera moves vertically downwards
* `zoom` / `gradually zooms in from below`: Camera lens adjusts magnification
##### Advanced Camera Movements
Combine multiple movements for cinematic complexity.
**Examples:**
* `The camera focuses on the teacher in the background, the girl in the foreground becomes blurred.`
* `Camera moves to the left. The statue holds an ancient book in its hands.`
* `Lens surround 360 degree display` for orbital movement
* `Handheld lens` for realistic, shaky movement
* `cuts to an overhead shot` for perspective changes
#### Shot Size and Perspective Control
Define the framing and viewpoint of your video with professional terminology.
* `long shot`: Shows the entire subject and its surroundings
* `wide shot`: Similar to long shot, emphasizing the environment
* `medium shot`: Frames the subject from the waist up
* `close shot`: Frames the subject from the chest up
* `close-up`: Focuses tightly on specific details, often the face
* `underwater`: Shot from beneath the water surface
* `aerial` / `overhead shot`: Shot from high above, often from drone or aircraft
* `high-angle`: Camera looks down on the subject
* `low-angle`: Camera looks up at the subject
* `macro`: Extreme close-up, revealing fine details
* `foreground shots`: Emphasize elements in the immediate foreground
* `miniature photography`: Creates dollhouse-like scale effects
#### Multi-Style Direct Output
Specify artistic styles for your video.
* `2D`: Flat, two-dimensional animation
* `3D`: Three-dimensional rendering
* `voxel`: Pixelated 3D style
* `pixel`: Retro 8-bit or 16-bit style
* `felt`: Appears as if made from felt fabric
* `clay`: Appears as if made from claymation
* `illustration`: Hand-drawn or digital illustration style
* `Japanese manga`: Distinctive Japanese comic book style
* `American comic`: Classic American comic book style
* `fabric` / `stitched`: Textile and material-based aesthetics
#### Aesthetics Control
Refine the visual and emotional tone of your video.
* **Character Appearance:** Describe specific features, clothing, or expressions
* Example: `A close-up shot of a young man with messy short black hair eating chicken thighs at night. He looks a little embarrassed, his face is dirty, his eyes are swollen.`
* **Visual Aesthetics:** Use terms like `cinematic`, `dreamlike`, `gritty`, `vibrant`, `monochromatic`
* **Video Type:** Specify `documentary`, `music video`, `short film`, `advertisement`
* **Emotion:** Convey feelings such as `joyful`, `melancholy`, `tense`, `peaceful`
* **Atmosphere:** Set the mood with `eerie`, `cozy`, `bustling`, `serene`
* Example: `blurred city night scene`, `bustling street`
* **Lighting:** Control lighting conditions
* `golden hour`, `moonlit`, `harsh`, `soft light hit the dial`
* `yellow and blue lights`
#### Multi-Shot Capability and Transitions
Create videos with multiple distinct shots and professional transitions.
* **Continuity:** Ensure smooth transitions between scenes
* **Shot Transitions:** Use commands like:
* `**Shot Switch.**` (Vinci format)
* `cut to`, `fade to black`, `dissolve to`
* `cuts to an overhead shot`
* **New Characters/Scenes:** Introduce new elements after transitions
**Examples:**
* `A man walks down the street, cut to a woman sitting in a cafe.`
* `Deep in the temple, a man with a backpack finds a statue. **Camera moves to the left.** The statue holds an ancient book.`
#### Advanced Effects and Transformations
Create sophisticated visual effects and character metamorphoses.
**Transformation Examples:**
* `The boy puts down his book, unbuttons his clothes to reveal a Spider-Man suit, puts on the Spider-Man mask, shoots webbing out of the frame.`
* `The boy is reading a book, and as he reads, he grows old. The cheeks are sagging more and more, the skin pores are becoming increasingly visible.`
**Time-Based Effects:**
* `The hands of the watch rotate at a constant speed. **Shot Switch.** The man raised his hand to hold his gold glasses.`
* `The frame gradually turns into a black and white style with obvious graininess.`
#### Focus and Depth of Field Control
Control visual focus and depth perception.
* **Focus Shifts:** `The camera focuses on the teacher in the background, the girl in the foreground becomes blurred`
* **Lens Focus:** Technical focus control for cinematic depth
* **Close-up Details:** `Close-up cat food is distinct`
#### Aspect Ratio Support
Specify the desired aspect ratio for your video.
* `1:1` (Square)
* `3:4` (Portrait)
* `4:3` (Standard Definition)
* `16:9` (Widescreen)
* `9:16` (Vertical/Mobile)
* `21:9` (Cinematic Widescreen)
#### Adverbs of Degree and Movement Quality
Adjust the intensity and style of actions.
* `slowly`, `quickly`, `rapidly`, `gently`, `forcefully`
* `at a constant speed`, `gradually`
* `steady and indifferent`, `very angrily`
#### Addressing Common Issues
* **Limb Collapse:** For complex character movements, ensure clear descriptions to prevent unnatural limb positioning
* **Clear Instructions:** Be specific and concise to ensure Vinci accurately interprets your creative vision
* **Character Consistency:** Use detailed physical descriptions to maintain character appearance throughout transformations
## Creative Examples
### Character Interaction
**Focus and Emotion:**
```text
The camera focuses on the teacher in the background, the girl in the foreground becomes blurred, and the teacher curses very angrily.
```
**Environmental Discovery:**
```text
Deep in the temple, a man with a backpack finds a statue of an ancient wise man. **Camera moves to the left.** The statue holds an ancient book in its hands, seemingly guarding some important knowledge.
```
### Detailed Character Work
**Rich Character Description:**
```text
A close-up shot of a young man with messy short black hair eating chicken thighs at night. He looks a little embarrassed, his face is dirty, his eyes are swollen, his jaws are round, there are a few black moles on his nose, a little beard, his teeth are a little yellow, his eyes are looking to the left of the picture, a little distracted, wearing a blue-gray tattered trench coat, and his cuffs and clothes are stained with a lot of dirt.
```
### Advanced Transformations
**Character Transformation:**
```text
The boy puts down his book, unbuttons his clothes to reveal a Spider-Man suit, puts on the Spider-Man mask, shoots webbing out of the frame, and quickly flies upward out of the frame towards the camera.
```
**Time-Based Effects:**
```text
The boy is reading a book, and as he reads, he grows old. The cheeks are sagging more and more, the skin pores are becoming increasingly visible, sideburns and a beard have grown, turning into a weathered uncle. The frame also gradually turns into a black and white style with obvious graininess.
```
**Complex Movement Sequence:**
```text
The steady and indifferent boy looks at the camera and takes off his earphones. Then he jumps off the tire, walks toward the camera, and squats down.
```
## Video Settings
#### Resolution
Choose your video quality and format.
**Example:** `resolution: "1080p"`
#### Duration
Set how long you want your video to be (in seconds).
**Example:** `duration: 5`
#### Fixed Camera
Keep the camera completely still throughout the video.
**Example:** `camerafixed: true`
## Visual Assets and References
The following assets demonstrate various prompting techniques and their results:
### Video Demonstrations
* Advanced character interactions and emotional scenes
* Complex camera movements and cinematography
* Environmental storytelling and scene composition
* Character transformations and metamorphosis effects
### Reference Images
* Camera movement diagrams and shot composition examples
* Lighting setup demonstrations
* Style comparison charts
* Character design references
## Tips for Image-to-Video Creation
When bringing your images to life, keep these tips in mind:
* **Image Quality:** Use high-resolution images for the best results
* **Describe the Motion:** Clearly explain how you want your image to move and animate
* **Focus on the Subject:** Make sure the main element in your image is clearly defined so Vinci knows what to animate
* **Stay Consistent:** Keep your motion description aligned with what's shown in your image
## Advanced Prompting Strategies
### Template Structure
Follow this structured approach for optimal results:
```text
[SUBJECT DESCRIPTION] + [ACTION/MOVEMENT] + [CAMERA INSTRUCTION] + [SCENE/ENVIRONMENT] + [STYLE/AESTHETIC]
```
### Multi-Shot Sequences
For complex narratives, use shot switches:
```text
[SCENE 1 DESCRIPTION]. **Shot Switch.** [SCENE 2 DESCRIPTION].
```
### Professional Camera Work
Combine multiple camera techniques:
```text
The camera quickly pushes in, then tracks right, and gradually rises to reveal the full scene.
```
## Conclusion
By mastering these prompting techniques and creative controls, you can unlock the full potential of Vinci's video generation platform. These techniques will help you create compelling and high-quality video content tailored to your exact creative vision.
The key to successful video creation lies in detailed descriptions, proper use of camera language, and understanding the platform's capabilities. Experiment with different combinations of techniques to achieve your desired visual storytelling goals and bring your creative ideas to life.
# Assets
Source: https://docs.tryvinci.com/docs/platform/assets
Your library of generated videos, images, and audio with actions for preview, download, share, and delete.
Assets are the AI-generated outputs you create on Vinci. Every successful generation automatically becomes an asset and is organized for easy retrieval.
## Types of assets
* Videos — AI-generated videos, animations, lip-sync content, translations
* Images — generated images, character portraits, transformed photos
* Audio — cloned voices, TTS files, translated audio
## Manage your assets
* Organization — grouped by type with timestamps and metadata
* Search & Filter — find assets by type or keywords
* Views — switch between grid and list
* Actions — preview, download, share (Twitter, Facebook, LinkedIn, WhatsApp), or delete
## Asset details
Each asset includes creation date, file type, and descriptive titles generated automatically.
Tip
Use consistent naming and tags in your prompts to make searching easier later.
# Explore
Source: https://docs.tryvinci.com/docs/platform/explore
Discover Vinci workflows — browse, search, and filter creative tools.
The Explore page is your central discovery and workflow hub. Browse AI video creation tools by category, search by use case, and sort by difficulty or ratings.
## What you can do
* Browse AI Workflows organized by category
* Search by use case or keyword
* Filter by rating, difficulty, or specific use cases
* Use the tour guide for onboarding
## Categories
* All Workflows — complete collection
* Video — video generation and animation tools
* Static — image creation and editing
* Labs — experimental and advanced features
* Publishing — distribution and sharing tools
## Workflow cards include
* Preview thumbnail and description
* Difficulty level (Beginner, Intermediate, Advanced)
* Use case badges (e.g., Marketing Videos, Social Content, Product Demos)
* Star ratings for quality assessment
Info
Use filters to quickly find relevant workflows by task and quality rating.
# Platform Overview
Source: https://docs.tryvinci.com/docs/platform/overview
What the Vinci AI Platform offers at a glance.
Vinci AI Studio is a comprehensive AI-powered video creation platform that enables users to generate professional-quality videos, images, and multimedia content without traditional filming equipment or complex editing skills. The platform serves businesses, creators, and marketers looking to produce engaging content at scale.
Browse workflows by category and discover tools.
Your generated videos, images, and audio in one library.
User-facing capabilities like AI Actors, Translation, Emote, and more.
## Benefits
* No technical skills required — intuitive interface for non-technical users
* Credit-based pricing with transparent usage
* Real-time progress tracking during generation
* Works great on mobile and desktop
* Automatic asset management and organization
* Professional quality output at scale
# API Keys
Source: https://docs.tryvinci.com/essentials/api-keys
Create, list, and revoke API keys. Include your key in the Authorization header as a Bearer token.
Vinci uses API keys for authentication. Include your key in every request.
```http title="HTTP Header"
Authorization: Bearer sk-your-api-key-here
```
Keep your API keys secure and never expose them in client-side code. Use environment variables or a secret manager.
## Get your first API key
The easiest way to get started is by creating your first API key through the [Vinci Dashboard](https://app.tryvinci.com/dashboard/api).
1. Sign in to your [Vinci account](https://app.tryvinci.com)
2. Navigate to the [API Keys page](https://app.tryvinci.com/dashboard/api)
3. Click "Create New API Key"
4. Give your key a descriptive name (e.g., "Development", "Production")
5. Copy and securely store your API key
Your API key will only be shown once. Make sure to copy it immediately and store it securely.
## Create API key
```http title="Endpoint"
POST /api/v1/keys
```
```http title="Authentication"
Authorization: Bearer sk-existing-api-key
```
```json title="Response"
{
"key_id": "vinci_abc123...",
"name": "Production API Key",
"api_key": "sk-your-new-api-key-here",
"rate_limit": 10,
"created_at": "2024-01-01T00:00:00Z"
}
```
```curl cURL
curl -X POST "https://tryvinci.com/api/v1/keys" \
-H "Authorization: Bearer sk-existing-api-key" \
-H "Content-Type: application/json" \
-d '{
"name": "Production API Key",
"rate_limit": 20
}'
```
```python create_key.py
import requests
url = "https://tryvinci.com/api/v1/keys"
headers = {
"Authorization": "Bearer sk-existing-api-key",
"Content-Type": "application/json",
}
data = { "name": "Production API Key", "rate_limit": 20 }
resp = requests.post(url, headers=headers, json=data)
resp.raise_for_status()
result = resp.json()
print(f"New API key: {result['api_key']}")
print(f"Key ID: {result['key_id']}")
```
```javascript create_key.js
const response = await fetch("https://tryvinci.com/api/v1/keys", {
method: "POST",
headers: {
"Authorization": "Bearer sk-existing-api-key",
"Content-Type": "application/json",
},
body: JSON.stringify({ name: "Production API Key", rate_limit: 20 }),
});
if (!response.ok) throw new Error(`HTTP ${response.status}`);
const result = await response.json();
console.log(`New API key: ${result.api_key}`);
console.log(`Key ID: ${result.key_id}`);
```
Tip
Store the full API key securely as it will not be shown again.
## List API keys
```http title="Endpoint"
GET /api/v1/keys
```
```http title="Authentication"
Authorization: Bearer sk-your-api-key-here
```
```json title="Response"
{
"api_keys": [
{
"key_id": "vinci_abc123...",
"name": "Production API Key",
"is_active": true,
"created_at": "2024-01-01T00:00:00Z",
"last_used": "2024-01-01T12:00:00Z",
"key_preview": "sk-...abc123...",
"rate_limit": 10
}
],
"count": 1
}
```
```curl cURL
curl -X GET "https://tryvinci.com/api/v1/keys" \
-H "Authorization: Bearer sk-your-api-key-here"
```
```python list_keys.py
import requests
url = "https://tryvinci.com/api/v1/keys"
headers = { "Authorization": "Bearer sk-your-api-key-here" }
resp = requests.get(url, headers=headers)
resp.raise_for_status()
result = resp.json()
print(f"Total API keys: {result['count']}")
for key in result["api_keys"]:
status = "Active" if key["is_active"] else "Disabled"
print(f"- {key['name']}: {key['key_preview']} ({status})")
```
```javascript list_keys.js
const response = await fetch("https://tryvinci.com/api/v1/keys", {
headers: { "Authorization": "Bearer sk-your-api-key-here" },
});
if (!response.ok) throw new Error(`HTTP ${response.status}`);
const result = await response.json();
console.log(`Total API keys: ${result.count}`);
result.api_keys.forEach((key) => {
const status = key.is_active ? "Active" : "Disabled";
console.log(`- ${key.name}: ${key.key_preview} (${status})`);
});
```
## Revoke API key
```http title="Endpoint"
DELETE /api/v1/keys/{key_id}
```
```http title="Authentication"
Authorization: Bearer sk-your-api-key-here
```
```json title="Response"
{
"message": "API key revoked successfully",
"key_id": "vinci_abc123..."
}
```
```curl cURL
curl -X DELETE "https://tryvinci.com/api/v1/keys/vinci_abc123..." \
-H "Authorization: Bearer sk-your-api-key-here"
```
```python revoke_key.py
import requests
key_id = "vinci_abc123..."
url = f"https://tryvinci.com/api/v1/keys/{key_id}"
headers = { "Authorization": "Bearer sk-your-api-key-here" }
resp = requests.delete(url, headers=headers)
resp.raise_for_status()
print(resp.json()["message"])
```
```javascript revoke_key.js
const keyId = "vinci_abc123...";
const response = await fetch(`https://tryvinci.com/api/v1/keys/${keyId}`, {
method: "DELETE",
headers: { "Authorization": "Bearer sk-your-api-key-here" },
});
if (!response.ok) throw new Error(`HTTP ${response.status}`);
const result = await response.json();
console.log(result.message);
```
## Rate limits
Default: 10 requests/min. Max: 100 requests/min.
```http title="Rate limit headers"
X-RateLimit-Limit: 10
X-RateLimit-Remaining: 7
X-RateLimit-Reset: 1640995200
```
```python rate_limit_handling.py
import time, requests
def get_with_retry(url, headers, max_retries=3):
for attempt in range(max_retries):
r = requests.get(url, headers=headers)
if r.status_code == 429:
time.sleep(60)
continue
r.raise_for_status()
return r
raise RuntimeError("Max retries exceeded")
```
```javascript rate_limit_handling.js
async function getWithRetry(url, options = {}, maxRetries = 3) {
for (let attempt = 0; attempt < maxRetries; attempt++) {
const r = await fetch(url, options);
if (r.status === 429) {
await new Promise((res) => setTimeout(res, 60_000));
continue;
}
if (!r.ok) throw new Error(`HTTP ${r.status}`);
return r;
}
throw new Error("Max retries exceeded");
}
```
## Best practices
* Rotate keys regularly.
* Use different keys per environment.
* Monitor last\_used to identify stale keys.
# Authentication
Source: https://docs.tryvinci.com/essentials/authentication
Use Bearer tokens in the Authorization header on every request.
All Vinci API requests require a Bearer token.
```http title="HTTP Header"
Authorization: Bearer sk-your-api-key-here
```
Tip
Keep your API key secret. Never expose it in client-side code. Use environment variables or a secure vault.
## Example: Authenticated request
```curl cURL
curl -X GET "https://tryvinci.com/api/v1/billing/balance" \
-H "Authorization: Bearer sk-your-api-key-here"
```
```python authenticated_request.py
import requests
headers = {
"Authorization": "Bearer sk-your-api-key-here",
"Content-Type": "application/json",
}
r = requests.get("https://tryvinci.com/api/v1/billing/balance", headers=headers)
r.raise_for_status()
print(r.json())
```
```javascript authenticated_request.js
const r = await fetch("https://tryvinci.com/api/v1/billing/balance", {
headers: { "Authorization": "Bearer sk-your-api-key-here" },
});
if (!r.ok) throw new Error(`HTTP ${r.status}`);
console.log(await r.json());
```
## Best practices
* Rotate keys periodically and keep separate keys for dev/staging/prod.
* Set rate limits appropriately for each environment.
* Monitor usage and last\_used to detect stale keys.
# Code blocks
Source: https://docs.tryvinci.com/essentials/code
Display inline code and code blocks
## Inline code
To denote a `word` or `phrase` as code, enclose it in backticks (\`).
```
To denote a `word` or `phrase` as code, enclose it in backticks (`).
```
## Code blocks
Use [fenced code blocks](https://www.markdownguide.org/extended-syntax/#fenced-code-blocks) by enclosing code in three backticks and follow the leading ticks with the programming language of your snippet to get syntax highlighting. Optionally, you can also write the name of your code after the programming language.
```java HelloWorld.java
class HelloWorld {
public static void main(String[] args) {
System.out.println("Hello, World!");
}
}
```
````md
```java HelloWorld.java
class HelloWorld {
public static void main(String[] args) {
System.out.println("Hello, World!");
}
}
```
````
# Images and embeds
Source: https://docs.tryvinci.com/essentials/images
Add image, video, and other HTML elements
## Image
### Using Markdown
The [markdown syntax](https://www.markdownguide.org/basic-syntax/#images) lets you add images using the following code
```md

```
Note that the image file size must be less than 5MB. Otherwise, we recommend hosting on a service like [Cloudinary](https://cloudinary.com/) or [S3](https://aws.amazon.com/s3/). You can then use that URL and embed.
### Using embeds
To get more customizability with images, you can also use [embeds](/writing-content/embed) to add images
```html
```
## Embeds and HTML elements
Mintlify supports [HTML tags in Markdown](https://www.markdownguide.org/basic-syntax/#html). This is helpful if you prefer HTML tags to Markdown syntax, and lets you create documentation with infinite flexibility.
### iFrames
Loads another HTML page within the document. Most commonly used for embedding videos.
```html
```
# Markdown syntax
Source: https://docs.tryvinci.com/essentials/markdown
Text, title, and styling in standard markdown
## Titles
Best used for section headers.
```md
## Titles
```
### Subtitles
Best used for subsection headers.
```md
### Subtitles
```
Each **title** and **subtitle** creates an anchor and also shows up on the table of contents on the right.
## Text formatting
We support most markdown formatting. Simply add `**`, `_`, or `~` around text to format it.
| Style | How to write it | Result |
| ------------- | ----------------- | ----------------- |
| Bold | `**bold**` | **bold** |
| Italic | `_italic_` | *italic* |
| Strikethrough | `~strikethrough~` | ~~strikethrough~~ |
You can combine these. For example, write `**_bold and italic_**` to get ***bold and italic*** text.
You need to use HTML to write superscript and subscript text. That is, add `` or `` around your text.
| Text Size | How to write it | Result |
| ----------- | ------------------------ | ---------------------- |
| Superscript | `superscript` | superscript |
| Subscript | `subscript` | subscript |
## Linking to pages
You can add a link by wrapping text in `[]()`. You would write `[link to google](https://google.com)` to [link to google](https://google.com).
Links to pages in your docs need to be root-relative. Basically, you should include the entire folder path. For example, `[link to text](/writing-content/text)` links to the page "Text" in our components section.
Relative links like `[link to text](../text)` will open slower because we cannot optimize them as easily.
## Blockquotes
### Singleline
To create a blockquote, add a `>` in front of a paragraph.
> Dorothy followed her through many of the beautiful rooms in her castle.
```md
> Dorothy followed her through many of the beautiful rooms in her castle.
```
### Multiline
> Dorothy followed her through many of the beautiful rooms in her castle.
>
> The Witch bade her clean the pots and kettles and sweep the floor and keep the fire fed with wood.
```md
> Dorothy followed her through many of the beautiful rooms in her castle.
>
> The Witch bade her clean the pots and kettles and sweep the floor and keep the fire fed with wood.
```
### LaTeX
Mintlify supports [LaTeX](https://www.latex-project.org) through the Latex component.
8 x (vk x H1 - H2) = (0,1)
```md
8 x (vk x H1 - H2) = (0,1)
```
# Navigation
Source: https://docs.tryvinci.com/essentials/navigation
The navigation field in docs.json defines the pages that go in the navigation menu
The navigation menu is the list of links on every website.
You will likely update `docs.json` every time you add a new page. Pages do not show up automatically.
## Navigation syntax
Our navigation syntax is recursive which means you can make nested navigation groups. You don't need to include `.mdx` in page names.
```json Regular Navigation
"navigation": {
"tabs": [
{
"tab": "Docs",
"groups": [
{
"group": "Getting Started",
"pages": ["quickstart"]
}
]
}
]
}
```
```json Nested Navigation
"navigation": {
"tabs": [
{
"tab": "Docs",
"groups": [
{
"group": "Getting Started",
"pages": [
"quickstart",
{
"group": "Nested Reference Pages",
"pages": ["nested-reference-page"]
}
]
}
]
}
]
}
```
## Folders
Simply put your MDX files in folders and update the paths in `docs.json`.
For example, to have a page at `https://yoursite.com/your-folder/your-page` you would make a folder called `your-folder` containing an MDX file called `your-page.mdx`.
You cannot use `api` for the name of a folder unless you nest it inside another folder. Mintlify uses Next.js which reserves the top-level `api` folder for internal server calls. A folder name such as `api-reference` would be accepted.
```json Navigation With Folder
"navigation": {
"tabs": [
{
"tab": "Docs",
"groups": [
{
"group": "Group Name",
"pages": ["your-folder/your-page"]
}
]
}
]
}
```
## Hidden pages
MDX files not included in `docs.json` will not show up in the sidebar but are accessible through the search bar and by linking directly to them.
# Pricing
Source: https://docs.tryvinci.com/essentials/pricing
Usage-based pricing with clear costs and guidance for managing spend.
Vinci uses simple usage-based pricing.
* Video generation: \$0.05 per second of generated video
* API management: Included
* Usage monitoring: Included
Info
All prices in USD. Costs are calculated based on actual processing time.
## Check balance
```http title="Endpoint"
GET /api/v1/billing/balance
```
```http title="Authentication"
Authorization: Bearer sk-your-api-key-here
```
```json title="Response"
{
"balance_usd": 25.50,
"total_spent_usd": 134.75
}
```
```curl cURL
curl -X GET "https://tryvinci.com/api/v1/billing/balance" \
-H "Authorization: Bearer sk-your-api-key-here"
```
```python check_balance.py
import requests
url = "https://tryvinci.com/api/v1/billing/balance"
headers = {"Authorization": "Bearer sk-your-api-key-here"}
r = requests.get(url, headers=headers)
r.raise_for_status()
balance = r.json()
print(f"Current balance: ${balance['balance_usd']:.2f}")
print(f"Total spent: ${balance['total_spent_usd']:.2f}")
```
```javascript check_balance.js
const r = await fetch("https://tryvinci.com/api/v1/billing/balance", {
headers: { "Authorization": "Bearer sk-your-api-key-here" },
});
if (!r.ok) throw new Error(`HTTP ${r.status}`);
const balance = await r.json();
console.log(`Current balance: $${balance.balance_usd.toFixed(2)}`);
console.log(`Total spent: $${balance.total_spent_usd.toFixed(2)}`);
```
## Usage statistics
```http title="Endpoint"
GET /api/v1/billing/usage?days={days}
```
```http title="Authentication"
Authorization: Bearer sk-your-api-key-here
```
```json title="Response"
{
"period_days": 30,
"total_requests": 156,
"total_seconds": 420.5,
"total_cost_usd": 21.025,
"current_balance_usd": 25.50,
"total_spent_usd": 134.75
}
```
```curl cURL
curl -X GET "https://tryvinci.com/api/v1/billing/usage?days=7" \
-H "Authorization: Bearer sk-your-api-key-here"
```
```python usage_stats.py
import requests
url = "https://tryvinci.com/api/v1/billing/usage?days=7"
headers = {"Authorization": "Bearer sk-your-api-key-here"}
r = requests.get(url, headers=headers)
r.raise_for_status()
usage = r.json()
print(f"Usage for last {usage['period_days']} days:")
print(f"- Total requests: {usage['total_requests']}")
print(f"- Total video seconds: {usage['total_seconds']}")
print(f"- Total cost: ${usage['total_cost_usd']:.2f}")
print(f"- Current balance: ${usage['current_balance_usd']:.2f}")
```
```javascript usage_stats.js
const r = await fetch("https://tryvinci.com/api/v1/billing/usage?days=7", {
headers: { "Authorization": "Bearer sk-your-api-key-here" },
});
if (!r.ok) throw new Error(`HTTP ${r.status}`);
const usage = await r.json();
console.log(`Usage for last ${usage.period_days} days:`);
console.log(`- Total requests: ${usage.total_requests}`);
console.log(`- Total video seconds: ${usage.total_seconds}`);
console.log(`- Total cost: $${usage.total_cost_usd.toFixed(2)}`);
console.log(`- Current balance: $${usage.current_balance_usd.toFixed(2)}`);
```
## Balance check helper
```python balance_check.py
import requests
def check_balance_for_video(duration_seconds, api_key):
balance_url = "https://tryvinci.com/api/v1/billing/balance"
headers = {"Authorization": f"Bearer {api_key}"}
r = requests.get(balance_url, headers=headers)
r.raise_for_status()
balance = r.json()
estimated_cost = duration_seconds * 0.05
if balance["balance_usd"] < estimated_cost:
return False
return True
```
```javascript balance_check.js
async function checkBalanceForVideo(durationSeconds, apiKey) {
const r = await fetch("https://tryvinci.com/api/v1/billing/balance", {
headers: { "Authorization": `Bearer ${apiKey}` },
});
if (!r.ok) throw new Error(`HTTP ${r.status}`);
const balance = await r.json();
const estimated = durationSeconds * 0.05;
return balance.balance_usd >= estimated;
}
```
## Error handling
When balance is insufficient, the API may return 402.
```json title="Insufficient balance response"
{
"detail": "Insufficient balance. Current balance: $1.25, required: $2.50"
}
```
```python handle_402.py
import requests
def make_video_request(prompt, duration, api_key):
url = "https://tryvinci.com/api/v1/generate/text-to-video"
headers = {"Authorization": f"Bearer {api_key}", "Content-Type": "application/json"}
data = {"prompt": prompt, "duration_seconds": duration}
r = requests.post(url, headers=headers, json=data)
if r.status_code == 402:
print(f"Insufficient balance: {r.json().get('detail')}")
return None
r.raise_for_status()
return r.json()
```
```javascript handle_402.js
async function makeVideoRequest(prompt, duration, apiKey) {
const url = "https://tryvinci.com/api/v1/generate/text-to-video";
const r = await fetch(url, {
method: "POST",
headers: {
"Authorization": `Bearer ${apiKey}`,
"Content-Type": "application/json",
},
body: JSON.stringify({ prompt, duration_seconds: duration }),
});
if (r.status === 402) {
const err = await r.json();
console.log(`Insufficient balance: ${err.detail}`);
return null;
}
if (!r.ok) throw new Error(`HTTP ${r.status}`);
return await r.json();
}
```
## Cost optimization tips
* Use shorter durations during development.
* Poll status every 5–10 seconds and implement retry backoff.
* Monitor usage weekly and set balance alerts.
# Reusable snippets
Source: https://docs.tryvinci.com/essentials/reusable-snippets
Reusable, custom snippets to keep content in sync
One of the core principles of software development is DRY (Don't Repeat
Yourself). This is a principle that applies to documentation as
well. If you find yourself repeating the same content in multiple places, you
should consider creating a custom snippet to keep your content in sync.
## Creating a custom snippet
**Pre-condition**: You must create your snippet file in the `snippets` directory.
Any page in the `snippets` directory will be treated as a snippet and will not
be rendered into a standalone page. If you want to create a standalone page
from the snippet, import the snippet into another file and call it as a
component.
### Default export
1. Add content to your snippet file that you want to re-use across multiple
locations. Optionally, you can add variables that can be filled in via props
when you import the snippet.
```mdx snippets/my-snippet.mdx
Hello world! This is my content I want to reuse across pages. My keyword of the
day is {word}.
```
The content that you want to reuse must be inside the `snippets` directory in
order for the import to work.
2. Import the snippet into your destination file.
```mdx destination-file.mdx
---
title: My title
description: My Description
---
import MySnippet from '/snippets/path/to/my-snippet.mdx';
## Header
Lorem impsum dolor sit amet.
```
### Reusable variables
1. Export a variable from your snippet file:
```mdx snippets/path/to/custom-variables.mdx
export const myName = 'my name';
export const myObject = { fruit: 'strawberries' };
```
2. Import the snippet from your destination file and use the variable:
```mdx destination-file.mdx
---
title: My title
description: My Description
---
import { myName, myObject } from '/snippets/path/to/custom-variables.mdx';
Hello, my name is {myName} and I like {myObject.fruit}.
```
### Reusable components
1. Inside your snippet file, create a component that takes in props by exporting
your component in the form of an arrow function.
```mdx snippets/custom-component.mdx
export const MyComponent = ({ title }) => (
{title}
... snippet content ...
);
```
MDX does not compile inside the body of an arrow function. Stick to HTML
syntax when you can or use a default export if you need to use MDX.
2. Import the snippet into your destination file and pass in the props
```mdx destination-file.mdx
---
title: My title
description: My Description
---
import { MyComponent } from '/snippets/custom-component.mdx';
Lorem ipsum dolor sit amet.
```
# Global Settings
Source: https://docs.tryvinci.com/essentials/settings
Mintlify gives you complete control over the look and feel of your documentation using the docs.json file
Every Mintlify site needs a `docs.json` file with the core configuration settings. Learn more about the [properties](#properties) below.
## Properties
Name of your project. Used for the global title.
Example: `mintlify`
An array of groups with all the pages within that group
The name of the group.
Example: `Settings`
The relative paths to the markdown files that will serve as pages.
Example: `["customization", "page"]`
Path to logo image or object with path to "light" and "dark" mode logo images
Path to the logo in light mode
Path to the logo in dark mode
Where clicking on the logo links you to
Path to the favicon image
Hex color codes for your global theme
The primary color. Used for most often for highlighted content, section
headers, accents, in light mode
The primary color for dark mode. Used for most often for highlighted
content, section headers, accents, in dark mode
The primary color for important buttons
The color of the background in both light and dark mode
The hex color code of the background in light mode
The hex color code of the background in dark mode
Array of `name`s and `url`s of links you want to include in the topbar
The name of the button.
Example: `Contact us`
The url once you click on the button. Example: `https://mintlify.com/docs`
Link shows a button. GitHub shows the repo information at the url provided including the number of GitHub stars.
If `link`: What the button links to.
If `github`: Link to the repository to load GitHub information from.
Text inside the button. Only required if `type` is a `link`.
Array of version names. Only use this if you want to show different versions
of docs with a dropdown in the navigation bar.
An array of the anchors, includes the `icon`, `color`, and `url`.
The [Font Awesome](https://fontawesome.com/search?q=heart) icon used to feature the anchor.
Example: `comments`
The name of the anchor label.
Example: `Community`
The start of the URL that marks what pages go in the anchor. Generally, this is the name of the folder you put your pages in.
The hex color of the anchor icon background. Can also be a gradient if you pass an object with the properties `from` and `to` that are each a hex color.
Used if you want to hide an anchor until the correct docs version is selected.
Pass `true` if you want to hide the anchor until you directly link someone to docs inside it.
One of: "brands", "duotone", "light", "sharp-solid", "solid", or "thin"
Override the default configurations for the top-most anchor.
The name of the top-most anchor
Font Awesome icon.
One of: "brands", "duotone", "light", "sharp-solid", "solid", or "thin"
An array of navigational tabs.
The name of the tab label.
The start of the URL that marks what pages go in the tab. Generally, this
is the name of the folder you put your pages in.
Configuration for API settings. Learn more about API pages at [API Components](/api-playground/demo).
The base url for all API endpoints. If `baseUrl` is an array, it will enable for multiple base url
options that the user can toggle.
The authentication strategy used for all API endpoints.
The name of the authentication parameter used in the API playground.
If method is `basic`, the format should be `[usernameName]:[passwordName]`
The default value that's designed to be a prefix for the authentication input field.
E.g. If an `inputPrefix` of `AuthKey` would inherit the default input result of the authentication field as `AuthKey`.
Configurations for the API playground
Whether the playground is showing, hidden, or only displaying the endpoint with no added user interactivity `simple`
Learn more at the [playground guides](/api-playground/demo)
Enabling this flag ensures that key ordering in OpenAPI pages matches the key ordering defined in the OpenAPI file.
This behavior will soon be enabled by default, at which point this field will be deprecated.
A string or an array of strings of URL(s) or relative path(s) pointing to your
OpenAPI file.
Examples:
```json Absolute
"openapi": "https://example.com/openapi.json"
```
```json Relative
"openapi": "/openapi.json"
```
```json Multiple
"openapi": ["https://example.com/openapi1.json", "/openapi2.json", "/openapi3.json"]
```
An object of social media accounts where the key:property pair represents the social media platform and the account url.
Example:
```json
{
"x": "https://x.com/mintlify",
"website": "https://mintlify.com"
}
```
One of the following values `website`, `facebook`, `x`, `discord`, `slack`, `github`, `linkedin`, `instagram`, `hacker-news`
Example: `x`
The URL to the social platform.
Example: `https://x.com/mintlify`
Configurations to enable feedback buttons
Enables a button to allow users to suggest edits via pull requests
Enables a button to allow users to raise an issue about the documentation
Customize the dark mode toggle.
Set if you always want to show light or dark mode for new users. When not
set, we default to the same mode as the user's operating system.
Set to true to hide the dark/light mode toggle. You can combine `isHidden` with `default` to force your docs to only use light or dark mode. For example:
```json Only Dark Mode
"modeToggle": {
"default": "dark",
"isHidden": true
}
```
```json Only Light Mode
"modeToggle": {
"default": "light",
"isHidden": true
}
```
A background image to be displayed behind every page. See example with
[Infisical](https://infisical.com/docs) and [FRPC](https://frpc.io).
# Vinci
Source: https://docs.tryvinci.com/index
AI video creation platform — generate videos from text or images in minutes.
# Welcome to Vinci Docs
Vinci is a platform for creating AI-powered videos and media. Use our APIs to generate videos from text or images, translate videos, and more.
Tip
Use the left sidebar to access all sections. Internal links use the /docs/... prefix where applicable.
## What you can build
* Text-to-Video and Image-to-Video generation
* Video status polling
* Account & billing integrations
Tip
Use the Quickstart to make your first API call and poll job status in under 5 minutes.
# null
Source: https://docs.tryvinci.com/platform
# Vinci AI Platform - User-Facing Description
## Platform Overview
Vinci AI Studio is a comprehensive AI-powered video creation platform that enables users to generate professional-quality videos, images, and multimedia content without traditional filming equipment or complex editing skills. The platform serves businesses, creators, and marketers looking to produce engaging content at scale.
## 1. The "Explore" Page - Your Creative Workflow Hub
**Purpose:** The Explore page serves as your central discovery and workflow management center where you can browse, search, and access all available AI video creation tools.
**What users can find and do:**
* **Browse AI Workflows:** Access categorized video creation workflows organized by type (Video, Static, Labs, Publishing)
* **Search Functionality:** Find specific workflows by use case, creative need, or keyword search
* **Filter by Category:** Sort workflows by:
* **All Workflows** - Complete collection of available tools
* **Video** - Video generation and animation tools
* **Static** - Image creation and editing tools
* **Labs** - Experimental and advanced features
* **Publishing** - Content distribution and sharing tools
* **Workflow Cards:** Each workflow displays:
* Preview thumbnail and description
* Difficulty level (Beginner, Intermediate, Advanced)
* Use case badges (e.g., "Marketing Videos", "Social Content", "Product Demos")
* Star ratings for quality assessment
* **Tour Guide:** Built-in onboarding system to help new users navigate the platform
* **Advanced Filtering:** Sort by rating, difficulty, or specific use cases
## 2. "Assets" - Your Creative Content Library
**What are Assets?**
From a user perspective, "Assets" are all the AI-generated content you've created on the platform. Think of it as your personal creative library where all your generated videos, images, and audio files are automatically saved and organized.
**Types of Assets:**
* **Videos:** AI-generated videos, animated characters, lip-sync content, translations
* **Images:** AI-generated images, character portraits, transformed photos
* **Audio:** Voice clones, text-to-speech files, translated audio
**How to Create and Manage Assets:**
* **Automatic Creation:** Every successful generation automatically becomes an asset
* **Organization:** Assets are categorized by type (video/image/audio) with timestamps
* **Search & Filter:** Find specific assets using the search bar or filter by media type
* **View Options:** Switch between grid and list view for better organization
* **Asset Actions:** Each asset supports:
* **Preview/Play:** View videos, images, or play audio directly
* **Download:** Save files to your device
* **Share:** Direct sharing to social media platforms (Twitter, Facebook, LinkedIn, WhatsApp) or copy shareable links
* **Delete:** Remove unwanted assets
* **Asset Details:** Each asset shows creation date, file type, and auto-generated descriptive titles
## 3. User-Facing Service Descriptions
### **AI Actors**
**What you can do:** Transform any image into a talking character by uploading a photo and either typing text or uploading your own audio. The AI will make the character's lips move perfectly in sync with the speech.
* **Voice Options:** Choose from Vinci's voice library or upload your own audio
* **Voice Cloning:** Upload an audio sample to clone any voice onto your character
* **Use Cases:** Product presentations, educational content, spokesperson videos, multilingual content
### **Image Generation**
**What you can do:** Create stunning, professional images from simple text descriptions. No design skills required.
* **Customizable Parameters:** Control image dimensions (1080x1920 default), generation steps (1-50), and creative guidance
* **Output Formats:** JPEG or PNG
* **Use Cases:** Social media graphics, marketing materials, concept art, product mockups
### **Video Generation**
**What you can do:** Create videos from text descriptions or animate existing images.
* **Text-to-Video:** Describe your vision and watch it come to life
* **Image-to-Video:** Upload an image and describe how you want it to move
* **Aspect Ratios:** Choose from 16:9 (landscape), 9:16 (portrait), 1:1 (square), 4:3 (standard), 3:4 (portrait), 21:9 (cinematic)
* **Duration:** 5-10 seconds per generation
* **Use Cases:** Social media content, product demos, animated marketing materials
### **Video Translation**
**What you can do:** Instantly translate any video to different languages while maintaining perfect lip sync.
* **Supported Languages:** English, Spanish, French (expandable)
* **Process:** Upload video → AI extracts speech → translates text → generates new speech → syncs lips
* **Use Cases:** Global marketing, multilingual education, international content distribution
### **Emote**
**What you can do:** Bring any character image to life using a driving video that controls their movements and expressions.
* **Character Library:** Select from pre-made characters or upload your own
* **Driving Videos:** Use template videos or upload custom movement patterns
* **Use Cases:** Animated storytelling, character-based marketing, educational content
### **QR Code Generation**
**What you can do:** Create custom, branded QR codes for marketing campaigns and digital connectivity.
## 4. Available User Options, Placeholders & Templates
### **Default Voice Options:**
* **Vinci Voices:** Professional voice library with multiple personas
* **User Voices:** Custom voice clones created from user audio samples
* **Voice Selection:** Categorized as "Vinci" (professional) or "User" (custom)
* **Default Fallback:** System uses "21m00Tcm4TlvDq8ikWAM" as default voice ID
### **Avatar & Character Library:**
* **Pre-made Characters:** Curated collection of AI actors and characters
* **User Characters:** Custom uploaded character images
* **Asset Types:** Separated into "image" (static characters) and "video" (AI actors)
* **Default Naming:** Auto-generated names like "Character 1", "Actor 1" if no custom name provided
### **Generation Parameters:**
**Image Generation Defaults:**
* **Resolution:** 1080x1920 (portrait optimized)
* **Steps:** 25 (quality vs. speed balance)
* **CFG Scale:** 7.5 (prompt adherence)
* **Seed:** Random (42 default, customizable)
* **Format:** JPEG (PNG optional)
**Video Generation Defaults:**
* **Aspect Ratio:** 16:9 (landscape)
* **Duration:** 5 seconds (5-10 second range)
* **Seed:** Random generation
* **Quality:** HD standard
**AI Actors Defaults:**
* **Frame Rate:** 30 fps
* **Batch Size:** 8 (processing efficiency)
* **CRF:** 19 (video quality)
* **Audio Processing:** Automatic format detection and conversion
### **Placeholder Text Examples:**
* **Image Generation:** "Describe the image you want to generate..."
* **Video Prompts:** "Describe the video you want to generate..." / "Describe the motion you want to see in the image..."
* **Character Dialogue:** "Type your dialogue here..." or "Click to type dialogue"
* **Search Fields:** "Search by use case, workflow, or creative need..."
### **Template Categories:**
* **Workflow Templates:** Pre-configured generation workflows for different use cases
* **Character Templates:** Ready-to-use character poses and expressions
* **Voice Templates:** Professional voice personalities for different content types
* **Aspect Ratio Templates:** Pre-set dimensions for various social media platforms
## Platform Benefits
* **No Technical Skills Required:** Intuitive interface designed for non-technical users
* **Credit-Based System:** Pay-per-use model with transparent pricing
* **Real-time Progress Tracking:** Visual progress bars and status updates during generation
* **Mobile & Desktop Optimized:** Responsive design works on all devices
* **Automatic Asset Management:** All creations saved and organized automatically
* **Professional Quality Output:** Broadcast-ready video and image quality
* **Scalable Creation:** Generate multiple variations quickly for A/B testing
# Quickstart
Source: https://docs.tryvinci.com/quickstart
Make your first Vinci API call and poll job status in 5 minutes (Python & JavaScript).
## Prerequisites
* A Vinci account and API key from [Vinci Dashboard](https://app.tryvinci.com/dashboard/api)
* Balance with sufficient credits
* See full guide at [Getting Started](/docs/guides/getting-started)
Keep your API key secret. Do not expose keys in client-side code.
## 1) Install dependencies
```bash title="Python"
pip install requests
```
```bash title="JavaScript (Node 18+)"
# No extra deps needed for fetch in Node 18+. For older versions, use node-fetch.
```
## 2) Create your first video (Text-to-Video)
```curl cURL
curl -X POST "https://tryvinci.com/api/v1/generate/text-to-video" \
-H "Authorization: Bearer sk-your-api-key-here" \
-H "Content-Type: application/json" \
-d '{
"prompt": "A serene sunset over a calm lake",
"duration_seconds": 5,
"aspect_ratio": "16:9"
}'
```
```python text_to_video.py
import requests, time
API_KEY = "sk-your-api-key-here"
url = "https://tryvinci.com/api/v1/generate/text-to-video"
headers = {
"Authorization": f"Bearer {API_KEY}",
"Content-Type": "application/json"
}
data = {
"prompt": "A serene sunset over a calm lake",
"duration_seconds": 5,
"aspect_ratio": "16:9"
}
resp = requests.post(url, headers=headers, json=data)
resp.raise_for_status()
result = resp.json()
print(f"Request ID: {result['request_id']}")
```
```javascript text_to_video.js
const API_KEY = "sk-your-api-key-here";
const response = await fetch("https://tryvinci.com/api/v1/generate/text-to-video", {
method: "POST",
headers: {
"Authorization": `Bearer ${API_KEY}`,
"Content-Type": "application/json",
},
body: JSON.stringify({
prompt: "A serene sunset over a calm lake",
duration_seconds: 5,
aspect_ratio: "16:9",
}),
});
if (!response.ok) throw new Error(`HTTP ${response.status}`);
const result = await response.json();
console.log(`Request ID: ${result.request_id}`);
```
## 3) Poll job status
```curl cURL
curl -X GET "https://tryvinci.com/api/v1/status/your-request-id" \
-H "Authorization: Bearer sk-your-api-key-here"
```
```python poll_status.py
import requests, time
API_KEY = "sk-your-api-key-here"
request_id = "your-request-id"
status_url = f"https://tryvinci.com/api/v1/status/{request_id}"
headers = {"Authorization": f"Bearer {API_KEY}"}
while True:
r = requests.get(status_url, headers=headers)
r.raise_for_status()
status = r.json()
if status["status"] == "completed":
print(f"Video ready: {status['video_url']}")
break
if status["status"] == "failed":
print("Generation failed")
break
print(f"Status: {status['status']}")
time.sleep(5)
```
```javascript poll_status.js
const API_KEY = "sk-your-api-key-here";
const requestId = "your-request-id";
async function checkStatus() {
const r = await fetch(`https://tryvinci.com/api/v1/status/${requestId}`, {
headers: { "Authorization": `Bearer ${API_KEY}` },
});
if (!r.ok) throw new Error(`HTTP ${r.status}`);
const status = await r.json();
if (status.status === "completed") {
console.log(`Video ready: ${status.video_url}`);
return;
}
if (status.status === "failed") {
console.log("Generation failed");
return;
}
console.log(`Status: ${status.status}`);
setTimeout(checkStatus, 5000);
}
checkStatus();
```
## Next steps
Learn how to properly authenticate your API requests.
Explore the full video generation API reference.
Understand billing and monitor your usage.
Learn how to handle errors gracefully.
# null
Source: https://docs.tryvinci.com/scripts/CHANGELOG_UPDATE_GUIDE
# Changelog Update Process
## How to Update the Changelog
### Step 1: Fetch Commit Data
Run the commit fetcher to get data from all production repositories:
```bash
./fetch-commits
```
This script fetches commits from:
* vinci-frontend:serving
* vinci-backend:prod
* artemis:serving
* vinci-clips:serving
* vinci-dfy:serving
Output files are stored in `scripts/temp/commits/`:
* `SUMMARY.md` - Overview and instructions
* `{repo}-formatted.md` - Human-readable commit summaries
* `{repo}-raw.json` - Raw API data from GitHub
### Step 2: Review Commit Data
Check the formatted files to understand what changed:
```bash
cat scripts/temp/commits/SUMMARY.md
cat scripts/temp/commits/vinci-frontend-formatted.md
cat scripts/temp/commits/vinci-backend-formatted.md
```
### Step 3: Curate Changelog Entries
Focus on USER-FACING changes only. Exclude:
* Docker/infrastructure updates
* Internal API changes
* Database migrations
* Development tooling
* CI/CD pipeline changes
Include:
* New features users can access
* Bug fixes that affect user experience
* Performance improvements users notice
* UI/UX changes
* New services or capabilities
### Step 4: Determine Version Numbers
Use semantic versioning (0.x.y):
* Major (0.X.0): New major features, significant UI changes
* Minor (0.x.Y): New features, improvements, enhancements
* Patch (0.x.y): Bug fixes only, no new functionality
### Step 5: Format Entries
Use Google-style release notes format:
* Neutral, technical language
* No emojis or marketing language
* Group by component/area
* Use consistent categories: "New features", "Improvements", "Bug fixes"
* Include actual release dates (not ranges)
### Step 6: Update changelog.mdx
Add new entries at the top, maintaining chronological order (newest first).
## File Structure
* Located at: `/changelog.mdx`
* Uses Mintlify Update components
* Generates RSS feed at: `/changelog/rss.xml`
* Navigation: Listed under "Meta" section with clock icon
## Automation Scripts
* `./fetch-commits` - Main script to fetch commit data
* `./scripts/fetch-commits.sh` - Core fetching logic
* `./scripts/demo-changelog.sh` - Demo with sample data
* `./scripts/README.md` - Detailed documentation
## Examples of Good Entries
✓ "Added image role labeling (product, person, environment, style, text)"
✓ "Fixed avatar image upload URL generation"
✓ "Implemented asynchronous processing"
## Examples to Avoid
✗ "Fixed Docker authentication issues"
✗ "Updated Cloud Run service account"
✗ "Migrated database schema"
Remember: Focus on what users can see, use, or benefit from directly.
## Template for New Entries
```mdx
## Component Name
**New features**
- Description of new functionality
**Improvements**
- Description of enhancements to existing features
**Bug fixes**
- Description of resolved issues
```

 ## Image
### Using Markdown
The [markdown syntax](https://www.markdownguide.org/basic-syntax/#images) lets you add images using the following code
```md

```
Note that the image file size must be less than 5MB. Otherwise, we recommend hosting on a service like [Cloudinary](https://cloudinary.com/) or [S3](https://aws.amazon.com/s3/). You can then use that URL and embed.
### Using embeds
To get more customizability with images, you can also use [embeds](/writing-content/embed) to add images
```html
## Image
### Using Markdown
The [markdown syntax](https://www.markdownguide.org/basic-syntax/#images) lets you add images using the following code
```md

```
Note that the image file size must be less than 5MB. Otherwise, we recommend hosting on a service like [Cloudinary](https://cloudinary.com/) or [S3](https://aws.amazon.com/s3/). You can then use that URL and embed.
### Using embeds
To get more customizability with images, you can also use [embeds](/writing-content/embed) to add images
```html
 ```
## Embeds and HTML elements
```
## Embeds and HTML elements
 **What you can do:** Transform any image into a talking character by uploading a photo and either typing text or uploading your own audio. The AI will make the character's lips move perfectly in sync with the speech.
* **Voice Options:** Choose from Vinci's voice library or upload your own audio
* **Voice Cloning:** Upload an audio sample to clone any voice onto your character
* **Use Cases:** Product presentations, educational content, spokesperson videos, multilingual content
### **Image Generation**
**What you can do:** Transform any image into a talking character by uploading a photo and either typing text or uploading your own audio. The AI will make the character's lips move perfectly in sync with the speech.
* **Voice Options:** Choose from Vinci's voice library or upload your own audio
* **Voice Cloning:** Upload an audio sample to clone any voice onto your character
* **Use Cases:** Product presentations, educational content, spokesperson videos, multilingual content
### **Image Generation**
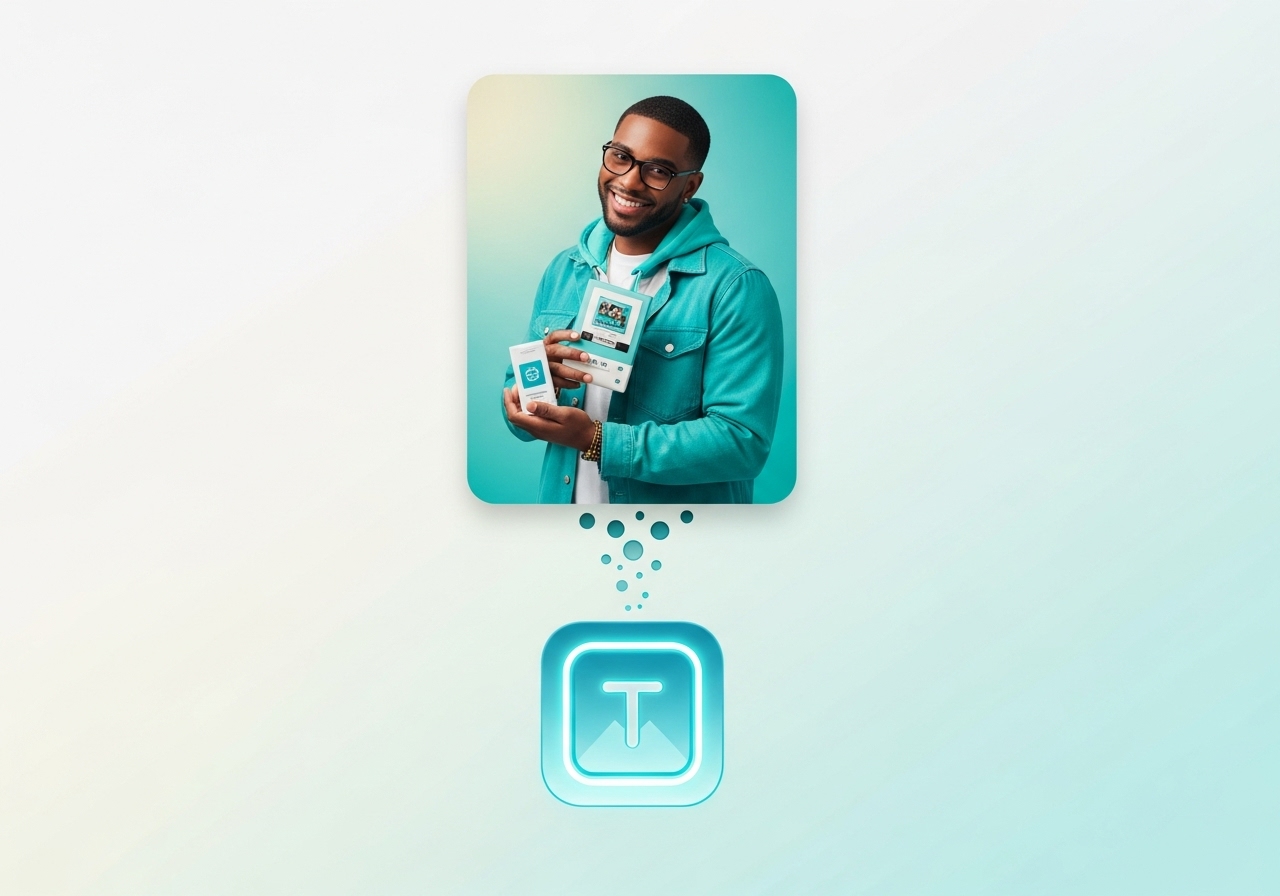 **What you can do:** Create stunning, professional images from simple text descriptions. No design skills required.
* **Customizable Parameters:** Control image dimensions (1080x1920 default), generation steps (1-50), and creative guidance
* **Output Formats:** JPEG or PNG
* **Use Cases:** Social media graphics, marketing materials, concept art, product mockups
### **Video Generation**
**What you can do:** Create stunning, professional images from simple text descriptions. No design skills required.
* **Customizable Parameters:** Control image dimensions (1080x1920 default), generation steps (1-50), and creative guidance
* **Output Formats:** JPEG or PNG
* **Use Cases:** Social media graphics, marketing materials, concept art, product mockups
### **Video Generation**
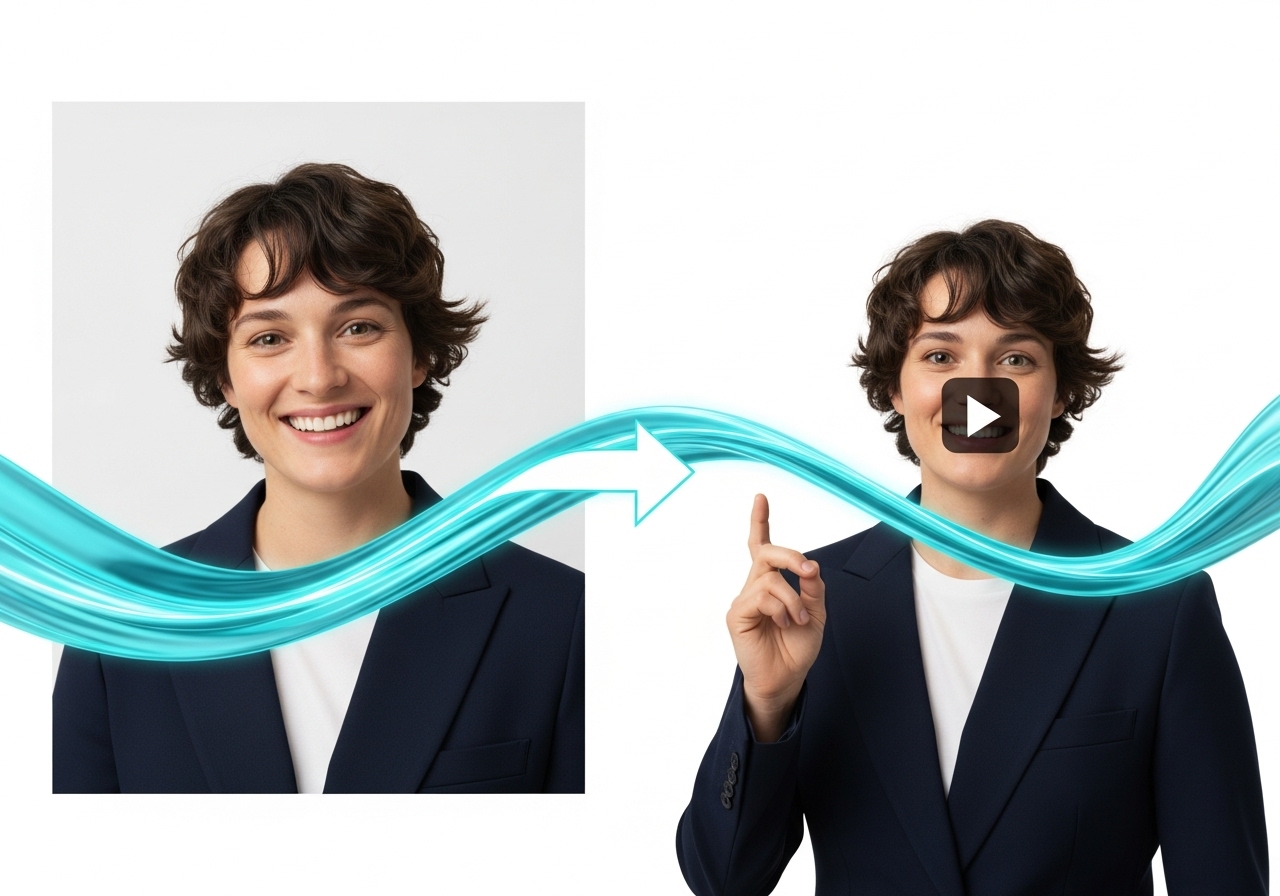 **What you can do:** Create videos from text descriptions or animate existing images.
* **Text-to-Video:** Describe your vision and watch it come to life
* **Image-to-Video:** Upload an image and describe how you want it to move
* **Aspect Ratios:** Choose from 16:9 (landscape), 9:16 (portrait), 1:1 (square), 4:3 (standard), 3:4 (portrait), 21:9 (cinematic)
* **Duration:** 5-10 seconds per generation
* **Use Cases:** Social media content, product demos, animated marketing materials
### **Video Translation**
**What you can do:** Create videos from text descriptions or animate existing images.
* **Text-to-Video:** Describe your vision and watch it come to life
* **Image-to-Video:** Upload an image and describe how you want it to move
* **Aspect Ratios:** Choose from 16:9 (landscape), 9:16 (portrait), 1:1 (square), 4:3 (standard), 3:4 (portrait), 21:9 (cinematic)
* **Duration:** 5-10 seconds per generation
* **Use Cases:** Social media content, product demos, animated marketing materials
### **Video Translation**
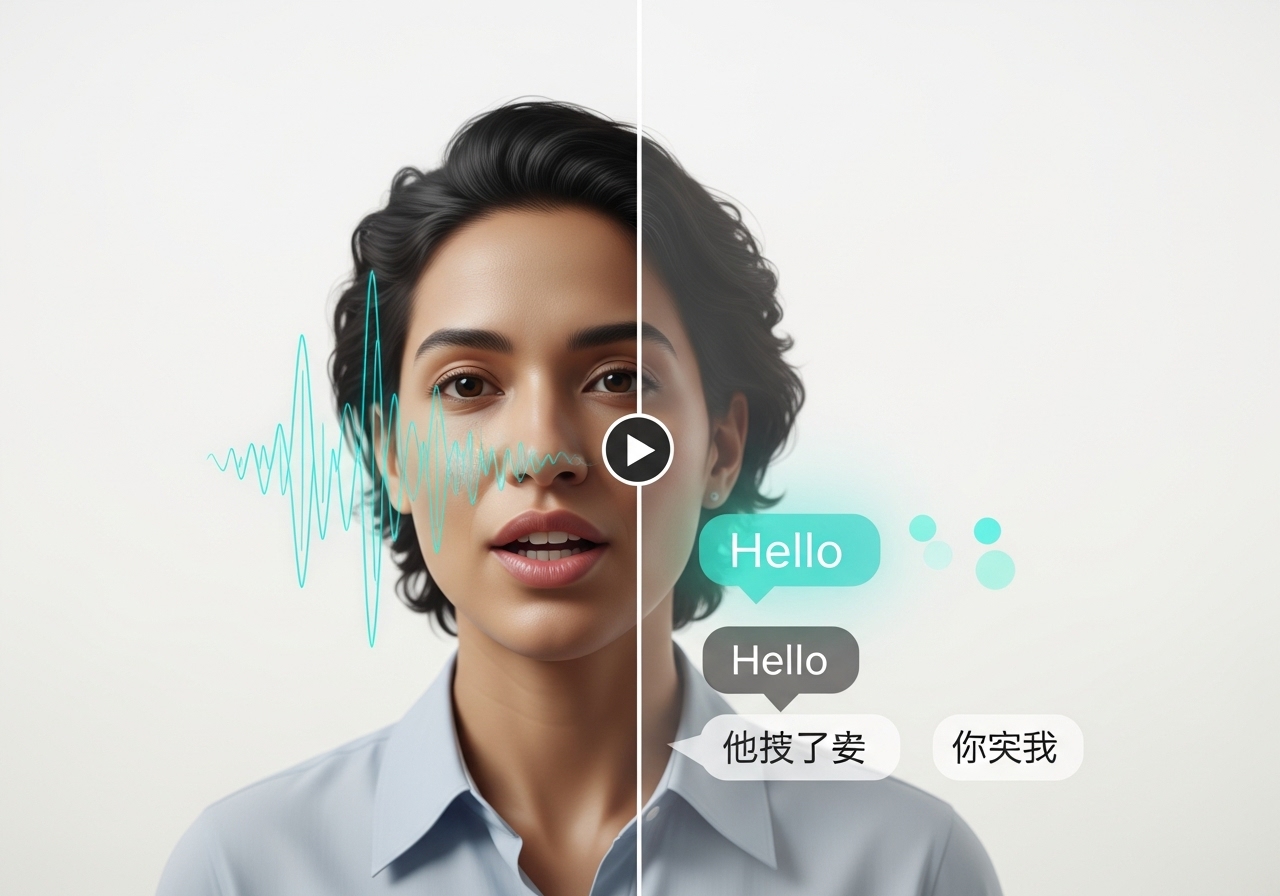 **What you can do:** Instantly translate any video to different languages while maintaining perfect lip sync.
* **Supported Languages:** English, Spanish, French (expandable)
* **Process:** Upload video → AI extracts speech → translates text → generates new speech → syncs lips
* **Use Cases:** Global marketing, multilingual education, international content distribution
### **Emote**
**What you can do:** Instantly translate any video to different languages while maintaining perfect lip sync.
* **Supported Languages:** English, Spanish, French (expandable)
* **Process:** Upload video → AI extracts speech → translates text → generates new speech → syncs lips
* **Use Cases:** Global marketing, multilingual education, international content distribution
### **Emote**
 **What you can do:** Bring any character image to life using a driving video that controls their movements and expressions.
* **Character Library:** Select from pre-made characters or upload your own
* **Driving Videos:** Use template videos or upload custom movement patterns
* **Use Cases:** Animated storytelling, character-based marketing, educational content
### **QR Code Generation**
**What you can do:** Create custom, branded QR codes for marketing campaigns and digital connectivity.
## 4. Available User Options, Placeholders & Templates
### **Default Voice Options:**
* **Vinci Voices:** Professional voice library with multiple personas
* **User Voices:** Custom voice clones created from user audio samples
* **Voice Selection:** Categorized as "Vinci" (professional) or "User" (custom)
* **Default Fallback:** System uses "21m00Tcm4TlvDq8ikWAM" as default voice ID
### **Avatar & Character Library:**
* **Pre-made Characters:** Curated collection of AI actors and characters
* **User Characters:** Custom uploaded character images
* **Asset Types:** Separated into "image" (static characters) and "video" (AI actors)
* **Default Naming:** Auto-generated names like "Character 1", "Actor 1" if no custom name provided
### **Generation Parameters:**
**Image Generation Defaults:**
* **Resolution:** 1080x1920 (portrait optimized)
* **Steps:** 25 (quality vs. speed balance)
* **CFG Scale:** 7.5 (prompt adherence)
* **Seed:** Random (42 default, customizable)
* **Format:** JPEG (PNG optional)
**Video Generation Defaults:**
* **Aspect Ratio:** 16:9 (landscape)
* **Duration:** 5 seconds (5-10 second range)
* **Seed:** Random generation
* **Quality:** HD standard
**AI Actors Defaults:**
* **Frame Rate:** 30 fps
* **Batch Size:** 8 (processing efficiency)
* **CRF:** 19 (video quality)
* **Audio Processing:** Automatic format detection and conversion
### **Placeholder Text Examples:**
* **Image Generation:** "Describe the image you want to generate..."
* **Video Prompts:** "Describe the video you want to generate..." / "Describe the motion you want to see in the image..."
* **Character Dialogue:** "Type your dialogue here..." or "Click to type dialogue"
* **Search Fields:** "Search by use case, workflow, or creative need..."
### **Template Categories:**
* **Workflow Templates:** Pre-configured generation workflows for different use cases
* **Character Templates:** Ready-to-use character poses and expressions
* **Voice Templates:** Professional voice personalities for different content types
* **Aspect Ratio Templates:** Pre-set dimensions for various social media platforms
## Platform Benefits
* **No Technical Skills Required:** Intuitive interface designed for non-technical users
* **Credit-Based System:** Pay-per-use model with transparent pricing
* **Real-time Progress Tracking:** Visual progress bars and status updates during generation
* **Mobile & Desktop Optimized:** Responsive design works on all devices
* **Automatic Asset Management:** All creations saved and organized automatically
* **Professional Quality Output:** Broadcast-ready video and image quality
* **Scalable Creation:** Generate multiple variations quickly for A/B testing
# Quickstart
Source: https://docs.tryvinci.com/quickstart
Make your first Vinci API call and poll job status in 5 minutes (Python & JavaScript).
## Prerequisites
* A Vinci account and API key from [Vinci Dashboard](https://app.tryvinci.com/dashboard/api)
* Balance with sufficient credits
* See full guide at [Getting Started](/docs/guides/getting-started)
**What you can do:** Bring any character image to life using a driving video that controls their movements and expressions.
* **Character Library:** Select from pre-made characters or upload your own
* **Driving Videos:** Use template videos or upload custom movement patterns
* **Use Cases:** Animated storytelling, character-based marketing, educational content
### **QR Code Generation**
**What you can do:** Create custom, branded QR codes for marketing campaigns and digital connectivity.
## 4. Available User Options, Placeholders & Templates
### **Default Voice Options:**
* **Vinci Voices:** Professional voice library with multiple personas
* **User Voices:** Custom voice clones created from user audio samples
* **Voice Selection:** Categorized as "Vinci" (professional) or "User" (custom)
* **Default Fallback:** System uses "21m00Tcm4TlvDq8ikWAM" as default voice ID
### **Avatar & Character Library:**
* **Pre-made Characters:** Curated collection of AI actors and characters
* **User Characters:** Custom uploaded character images
* **Asset Types:** Separated into "image" (static characters) and "video" (AI actors)
* **Default Naming:** Auto-generated names like "Character 1", "Actor 1" if no custom name provided
### **Generation Parameters:**
**Image Generation Defaults:**
* **Resolution:** 1080x1920 (portrait optimized)
* **Steps:** 25 (quality vs. speed balance)
* **CFG Scale:** 7.5 (prompt adherence)
* **Seed:** Random (42 default, customizable)
* **Format:** JPEG (PNG optional)
**Video Generation Defaults:**
* **Aspect Ratio:** 16:9 (landscape)
* **Duration:** 5 seconds (5-10 second range)
* **Seed:** Random generation
* **Quality:** HD standard
**AI Actors Defaults:**
* **Frame Rate:** 30 fps
* **Batch Size:** 8 (processing efficiency)
* **CRF:** 19 (video quality)
* **Audio Processing:** Automatic format detection and conversion
### **Placeholder Text Examples:**
* **Image Generation:** "Describe the image you want to generate..."
* **Video Prompts:** "Describe the video you want to generate..." / "Describe the motion you want to see in the image..."
* **Character Dialogue:** "Type your dialogue here..." or "Click to type dialogue"
* **Search Fields:** "Search by use case, workflow, or creative need..."
### **Template Categories:**
* **Workflow Templates:** Pre-configured generation workflows for different use cases
* **Character Templates:** Ready-to-use character poses and expressions
* **Voice Templates:** Professional voice personalities for different content types
* **Aspect Ratio Templates:** Pre-set dimensions for various social media platforms
## Platform Benefits
* **No Technical Skills Required:** Intuitive interface designed for non-technical users
* **Credit-Based System:** Pay-per-use model with transparent pricing
* **Real-time Progress Tracking:** Visual progress bars and status updates during generation
* **Mobile & Desktop Optimized:** Responsive design works on all devices
* **Automatic Asset Management:** All creations saved and organized automatically
* **Professional Quality Output:** Broadcast-ready video and image quality
* **Scalable Creation:** Generate multiple variations quickly for A/B testing
# Quickstart
Source: https://docs.tryvinci.com/quickstart
Make your first Vinci API call and poll job status in 5 minutes (Python & JavaScript).
## Prerequisites
* A Vinci account and API key from [Vinci Dashboard](https://app.tryvinci.com/dashboard/api)
* Balance with sufficient credits
* See full guide at [Getting Started](/docs/guides/getting-started)